Building the Registration Pages
Log-in presupposes a collection of valid usernames and passwords in the database. The best way to get those combinations into the database is to create a registration form that inserts them there. This is a departure from the database interaction you have been working with for the past several lessons. In those lessons, you retrieved data from the database and filtered and manipulated it for the user. Here, you are making it possible for the user to insert information into the database. Fortunately, Dreamweaver has a behavior that makes that insertion easy.
But merely inserting information is not enough. You also need to check to ensure that two people didn't use the same username. To prevent this problem, you'll use one of an entire suite of user authentication server behaviors: Check New Username. If it succeeds, the user is registered and redirected to the log-in page. If it fails, the user is redirected to a registration failed page.
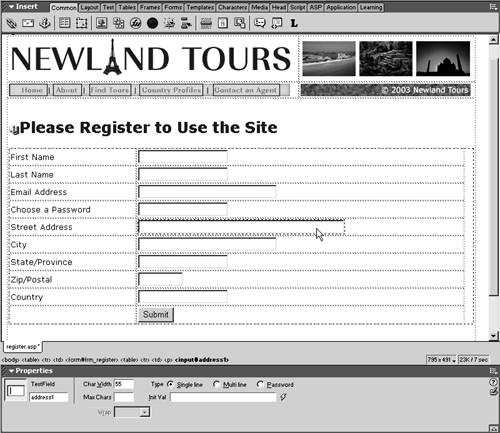
Open generic_template.asp. Save it as register.asp. In the Toolbar, give it a title of Newland Tours: Register. Replace the placeholder heading with Please Register to Use the Site.
Now the page has a basic identity.
Delete the placeholder line of body text, and insert a form. Use the Property inspector to name the form frm_register (leaving the action and method attributes alone for now). With the insertion point inside the form, insert a table with 2 columns, 10 rows, a cellpadding of 3, cellspacing of 0, width of 98 percent, and a border of 0.
The table will be used to structure the elements in the form.
Insert elements as shown in the screenshot. Use the Property inspector to name the text fields as follows:
firstName
lastName
username
pwd
address1
city
state_province
zip_postal
country
Don't take any shortcuts in this step. You will be very sorry if you leave each of the text fields with their default name (textfield1, textfield2, etc.). You should always use descriptive names for every field, or it becomes nearly impossible to create the scripts that make use of the data from these fields. In addition, the names listed above correspond to the fields in the database where this data will go, which makes it much easier to add the server behavior that inserts the records.
Use the Char Width setting in the Property inspector to lengthen or shorten the text fields. For example, I set address1 to 55 characters wide, to make additional room in that field.
You can drag the column divider to the left, to make extra room for the right column.
Position the insertion point in the empty cell to the left of the Submit button. From the Forms tab of the Insert panel, insert a hidden field element. Name it userGroup, and type visitor as its value.
The purpose of this step is not immediately clear, unless you know what's going to follow.
Hidden fields are used in forms to pass predetermined data when the form is submitted. In this case, when the form is submitted, along with name value pairs such as firstName=Lyra and lastName=Bellacqua, the form will also pass userGroup=visitor. Unlike the firstName and lastName fields, the userGroup value is read-only, which means users won't be able to edit it.
You're probably wondering what userGroup is in the first place. Remember, the site will be set up to enable three different levels of visitors: nonregistered guests, registered guests, and Newland Tours employees. Two of these groups, registered guests and employees, will have different permissions. Employees will be able to access a whole set of admin pages that registered guests cannot. The catch is that both sets of users will log in using the same form. So the log-in script needs some way to distinguish between the different types of users. The way it does this is by checking which group they've been assigned toa setting stored in their record in tbl_users of the database. But you obviously don't want users to be able to make this decision themselvesyou need to ensure that everyone who registers with the public form is set up as a visitor.
To add employees to the admin group, you'll either need to build a second log-in page or employees will have to modify that user's record in the database. In the next lesson, you'll build a simple interface in the admin section of the site that enables employees to change a person's profile to be in the administrator group.
Click to select the Submit button, and in the Server Behaviors panel, click the Add Server Behavior (+) button to add an Insert Record behavior.
The Insert Record behavior matches data entered in the form to fields in the database, creating a new record in the database and populating it with the user-entered data.
This form will add a record to tbl_users, which you will later use in the log-in script to verify that the user is registered, as well as to determine which user group the user is a member of.
In the Insert Record dialog, select conn_newland as the Connection, tbl_users as the Table. In the After Inserting Go To field, type login.asp. In the Get Values From field, make sure frm_register is selected.
You are familiar enough with building queries that a lot of this dialog should already be familiar to you (especially the Connection and Insert Into Table settings). Like the Recordset dialog, the Insert Record dialog builds a SQL query. But unlike the Recordset dialog, the query built here does not retrieve data, but rather inserts it.
NOTE
ColdFusion users will notice that their version of the Insert Record dialog looks slightly different than the one shown here, for ASP. However, the differences are mostly cosmetic, and all variations are noted in the text, where appropriate.
Inserting data, as mentioned earlier, is a matching activity: One item of data from a form is matched to one field in the destination table. That matching is what the lower half of the dialog is all about. Each of the items should follow this syntax: (for ASP) item_x inserts into column "item_x" (Text) or (for ColdFusion) item_x Gets Value From 'FORM.item_x' as 'Text'. One instance of item_x is the field from the form (on the left in ASP, and on the right in ColdFusion). The other is the column name in the table (on the right in ASP, and on the left in ColdFusion). The Text part refers to the variable type (e.g., text, date, integer, etc.).
In your dialog, all of the items on the left should match the items on the right, and they must be the same type. That is, if the database is expecting a number, then ASP or ColdFusion must insert a number; otherwise, ASP or ColdFusion will display an error message. In this case, the form names and the database field names match, but they don't have to: you can name your form fields differently than your database table fields. However, if they have the same name, Dreamweaver does the matching for you. If their names differ, you'll have to manually match the form fields with their corresponding table fields.
If you have any fields that don't have a corresponding column (besides userID and address2, which should not have a corresponding column or value, if they appear), select them, and choose the proper Column (ASP) or Value (ColdFusion) from the drop-down menu at the bottom of the dialog. You shouldn't have any stray fields, though, unless you entered a typo as the field name for one of the text fields in the form.
Click OK.
The Server behavior is applied. The form turns cyan, indicating that a Server behavior has been applied to it.
Click to select the Submit button again, and this time add a Check New Username server behavior, which appears in a submenu from the User Authentication section of the new Server Behavior menu.
This Server behavior ensures that the username entered in the form is unique.
In the Check New Username dialog, select username from the Username field drop-down menu, and type registration_failed.asp in the If Already Exists, Go To field. Click OK.
Here, you are ensuring that the value entered in the username field doesn't already exist. Since you asked for the user's email address to use as their username, this shouldn't be a problem for legitimate users.
Back on the main page, select the Submit button once again, and from the Behaviors (not Server Behaviors) panel, add a Validate Form behavior. Make each of the fields required. In addition, make sure the username field will accept only Email Address.
Whenever you create a form, make sure you deploy some sort of form validation, whether it's a client-side JavaScript behavior such as the one used here, or a server-side script like the one you wrote earlier in the book.
Save, upload, and close register.asp.
You don't need to test it now, since, whether you are successful or unsuccessful in your registration, you will be redirected to a page that doesn't yet exist.
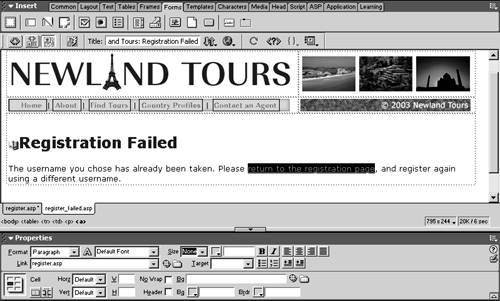
Starting with generic_template.asp, create a new page called registration_failed.asp. Use the Toolbar to title it Newland Tours: Registration Failed. Make it look like the page shown in the screenshot. The link should point to register.asp.
Users are redirected to this page if the Check New Username Server behavior detects that the username already exists.