Restricting Access to Pages
By now, you should have tested your registration and log-in pages, and they should work as expected. The only thing is, until you implement page restriction features to the pages you want to block access to, your registration and log-in framework is not very useful. In this task, you will add the server behaviors that prevent users from accessing pages, unless they've first logged in.
Open profiles.asp.
This is one of the pages that users must log in to see.
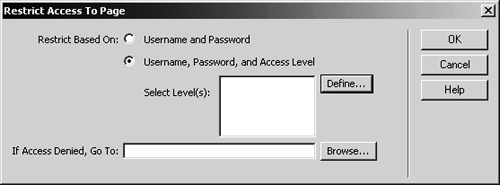
Click anywhere on the page, and insert a Restrict Access to Page server behavior, found in the User Authentication submenu of the Server Behaviors menu. In the Restrict Based On group, choose Username, Password, and Access Level.
This dialog not only lets you restrict access to the page; it also lets you restrict access to page based on a user's access level.
Of course, no such levels are defined in the Select Level(s) area, so you'll need to define some.
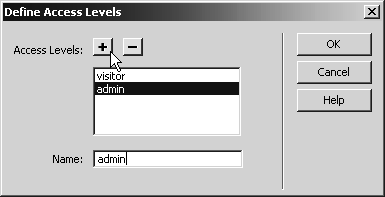
Click the Define button. In the Define Access Levels dialog, place the cursor in the Name field, type visitor, and press the + button. Repeat the process to add admin. Click OK.
Dreamweaver won't check to make sure these groups actually exist; it takes your word for it, so make sure you spell them correctly. These correspond to the available values in the userGroup field of tbl_users. Once it knows their names, Dreamweaver can grant access to pages to users in either or both groups, and deny access to users not in either.
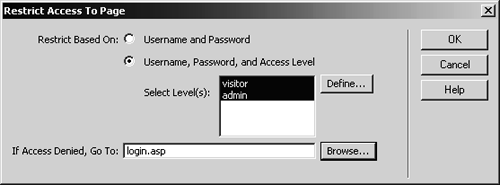
Back in the Restrict Access to Page dialog, Ctrl-click (Windows) or Command-click (Mac) to select both visitor and admin from the Select Level(s) area. In the If Access Denied, Go To field, enter login.asp. Click OK.
You've done two things in this step. You've granted access to the page to users in either the visitor or admin group. Had you wanted to grant access to this page to only one of those groups, you would have selected only the one group. Once you've created the admin section of the site, you'll use this dialog and let in only members of the admin group.
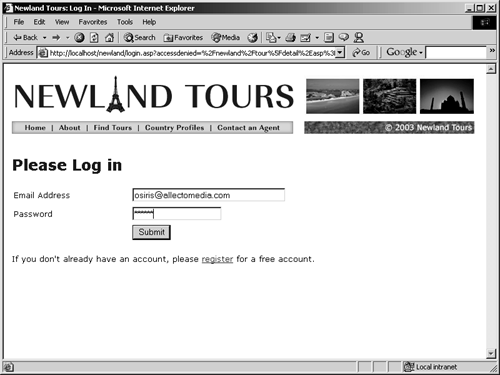
The other thing you've done is redirect the user to login.asp if access is denied. This is how that interception described earlier happens. A user tries to access a restricted page without logging in, and she or he sees the log-in dialog. Once log-in is achieved, the restricted page she or he was trying to access appears.
Repeat steps 1 through 4 for each of the following files:
profiles_detail.asp
tour_detail.asp
tourprice.asp
tourprice_processor.asp
tours.asp
Each of these pages now requires authentication as well.
Save and upload all of the pages you have worked on in this lesson, and, starting from the homepage (index.asp), try accessing the tours and the country profiles.
The authentication framework is fully functional.
Open index.asp, and add links at the bottom of the left navigation bar connecting to the registration and log-in pages: Register (Free!) and Log In.
Since users will be intercepted if they attempt to enter restricted pages, and since you took the time to add a link from the log-in page to the registration page, users should find everything even without these links. Still, their presence here makes it that much easier for visitors and employees alike to use the site.