Building the Form
In this task, you will build the form that users will fill out to provide the calculation script with sufficient information to create the estimate. The form that you are about to build has two items of note. It includes an embedded table, used for formatting. You saw this technique in Lesson 6, when you built the contact form. The other item of note is the use of a drop-down menu.
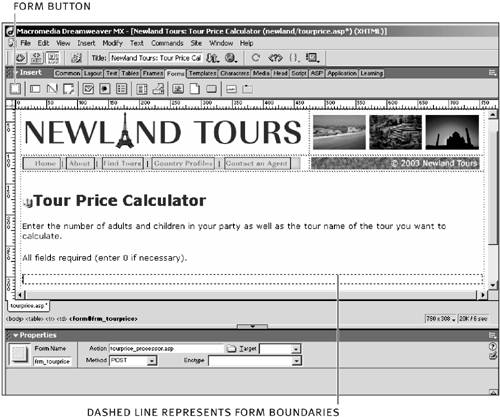
Open tourprice.asp. Position the insertion point at the end of the All fields required line, after the period. Using the Forms tab in the Insert panel, click the Form button. In the Property inspector, name the form frm_tourprice, specify tourprice_processor.asp as its Action, and verify that POST is selected as its Method.
Without any fields or submit button, the form cannot do anything, but it's a start.
With the insertion point inside the form, click the Insert Table button from the Tables tab of the Insert panel. In the ensuing dialog, specify 4 rows, 2 columns, cell padding of 3, cell spacing of 0, a width of 60 percent, and a border of 0.
When you are finished, the form stretches to accommodate the new table that appears.
In the top three cells of the left column, enter Number of Adults, Number of Children, Tour Name. In the right column, from top to bottom, insert a text field, another text field, a list/menu, and a Submit button, using the Forms tab of the Insert panel.
The Forms tab makes building Web forms a snap. However, you still need to configure each of the form elements.
Select the first text field, and in the Property inspector, name it numAdults. Likewise, name the second text field numChildren.
Remember, the field names are also the variable names that ASP/ColdFusion uses to extract the data, so it is important to give them a meaningful name.
Select the menu, and in the Property inspector, name it tourName and then click the List Values button. In the List values dialog, click below Item Label, and type Highlights of Argentina. Press Tab and type 500. Pressing Tab to continue, enter Highlights of Western Canada, 700, Egyptian Pyramids and More, and finally 900.
To understand what's happening in this step, let's compare form menus with text fields. When you create a text field, you give it a name. When the user types in the field, that information is the field's value. Thus, the firstName text field you created in previous lessons carried whatever value the user entered into it on the second pagethe one that collects and displays the form data.
Menus work a bit differently than forms. Like text fields, they're given names, and the data associated with them is stored with that name. Thus, on the page that processes this form, Request.Form("tourName") (ASP) or #form.tourName# (ColdFusion) would retrieve this data.
But the similarity ends there. Drop-down menus are not as open-ended as text fields. With drop-down menus, users select from a finite number of options that the developer specifies. The options that the user chooses from are entered in the Item Label column of the List Values dialog. The Value column of the List Values dialog is the data value that is sent with the form. Thus, if a user chooses Egyptian Pyramids and More, then Request.Form("tourName") (ASP) or #form.tourName# (ColdFusion) would retrieve 900. You'll use that value shortly when you perform the actual calculation.
NOTE
The item label does not get submitted with the form to the next page. It remains in the form itself to enable the user to make a selection. The reason that the item label and values are separate is so that you can submit a value other than the label to the script. Since you are performing mathematical calculations, you need a numeric data value, rather than a text string.
Clearly, Newland Tours offers more than three tours. Entering them one by one would be tedious, to say the least. Worse, if you wanted to add or remove a tour, you'd have to revisit the List Values dialog to fix it. There is a better way: You can dynamically load the labels and their values from a database to automatically generate this menu on the fly. You'll see how to do that in Lesson 9. But for now, you'll hard-code these values just to build the core functionality.
Another problem with the current form might have occurred to you. Right now, if a user selects Egyptian Pyramids and More, only the value 900 is sent. You can multiply that by the number of adults or children, but there is no way to send separate values for each. The whole point of the application is to provide an estimate that reflects the values of both the price for adults and for children. You'll fix this problem as well in Lesson 9, by retrieving both figures from a database.
Save tourprice.asp, and press F12 to test it in a browser.
The form is complete and ready to use. Before moving onto the server-side code, however, you should test it in a browser to verify that it looks as expected. You can press Submit if you like, and tourprice_processor.asp should appear, but it won't look any different than before.
When you are finished, close tourprice.asp.


