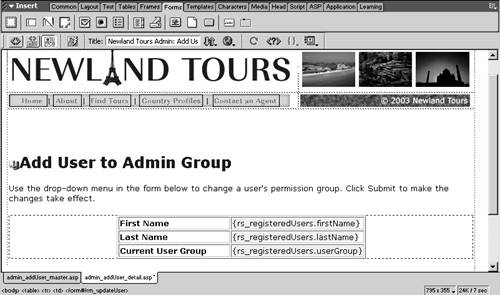
Making the Detail Page Updateable
Other than the convenience of using a ready-made object to create master-detail pages, nothing you have done is terribly new, since you've deployed most of the functionalities aggregated on these two pages during the course of the book. But what you'll add in this task is new: You'll use the filtered display as a means of identifying the row to update.
This task should be easy, since you are merely adding a simple server behavior to a form that will have a single field. But it's not that simple. Both ASP and ColdFusion versions of the server behaviors wind up not working as expected, though for different reasons. The ASP version of the server behavior sends a superfluous querystring parameter that creates a conflict with another querystring. And the ColdFusion version of the server behavior gives a URL parameter an unexpected name, which might cause you to mismatch a pair of values.
I must emphasize that neither of these issues matter if you are applying the Update Record behavior to a simple page. But as you know, admin_addUser_detail.asp is not a simple pageit is a part of the great complexity of server behaviors and dynamic elements that is the Master-Detail Page Set application object.
Both sets of problems are fairly easy to fix. The important point to realize is that once again you can't rely entirely on the convenient server behaviors: You must deal with code, both to create functionality that the server behaviors can't create or to customize (and in this case fix) the code that the server behaviors generate.
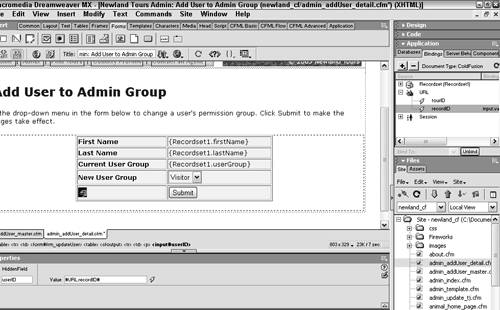
In admin_addUser_detail.asp, create a new form (frm_updateUser), and place the table inside it.
You've used tables to structure form content through the book. Here, you are including dynamic content within that table, but the presence of dynamic content makes no difference to the form. The only portions affected by the form itself are form elements, and you haven't added them yet.
Position the insertion point anywhere in the bottom row. Choose Modify > Table > Insert Rows or Columns. In the dialog, specify 2 rows below the selection, and click OK.
The newly created fourth row will contain a menu enabling users to change user groups, and the fifth row will hold the Submit button.
In the left cell of the fourth row, type New User Group and make it bold. Insert a menu element. Use the Property inspector to name this element userGroup. Click the List Values button, and enter Visitor and visitor as the first row's item label and value, and Admin and admin as the second row's item label and value. Click OK. Back in the Property inspector click Visitor in the Initially Selected area.
This menu makes it possible for the user to specify only one of two user group options. Its values are static, and if Newland Tours ever renamed or added a new user group, the HTML would have to be modified. This could be handled dynamically, of course, but that would require a new database table, joins, and all sorts of code. Sometimes, hard-coding is simply more cost-effective than doing everything dynamically.
NOTE
Make sure you do not misspell either of the values, or the affected users won't be able to log in at all!
Place the insertion point in the right cell of the bottom row, and insert a Submit button.
Most forms don't do much without one of these.

ColdFusion Users Only: In the cell to the left of the Submit button, insert a hidden field element. Use the Bindings panel to add a new URL variable called recordID. Select the hidden field in the form, and bind the new URL variable to that hidden field.
The ColdFusion version of the Update Record server behavior requires that you pass the primary key to the field you are updating. The ASP version, in contrast, requires that you do not pass this value.
You would think that the URL parameter passed to this page would be called userID, because that is, in fact, the value being passed, as you specified in the Insert Master-Detail Page Set dialog. In ASP, that is the name. For some reason, the ColdFusion version of the server behavior names the URL parameter recordID, rather than userID. So when you bind the URL parameter to the userID hidden field, you have to specify the variable name Dreamweaver added to the ColdFusion code.
Click to select the Submit button, and initiate an Update Record server behavior from the Server Behaviors panel.
Updating records requires a special SQL command, called UPDATE. You have used both SELECT and INSERT in the course of this book, but you haven't looked at UPDATE yet. The server behavior will generate all of the SQL for you, but you should at least be generally familiar with the UPDATE syntax, which is as follows:
UPDATE tbl_table
SET fieldName = 'New value for this field'
WHERE keyID = '123456';
When you update a record, you specify a table. Then, you use SET to specify the new value. Finally, you use the WHERE clause to identify which row. Optionally, you can specify multiple fields to update in the SET clause; to do so, just separate each field name-new value combination with a comma.
NOTE
If you use UPDATE without a WHERE clause that specifies the row, you'll end up changing the value of every row.
Though you won't need to in this lesson, sometimes you need to modify the SQL, and it's important to learn SQL as you learn dynamic Web site development.
The ASP and ColdFusion versions of the Update Record dialog are sufficiently different cosmetically that I'll break them down separately.
ASP Users Only: In the Update Record dialog, choose conn_newland as the connection, tbl_users as the Table To Update, rs_registeredUsers in the Select Record From menu, userID as the Unique Key Column (the Numeric checkbox should remain checked). In the After Updating, Go To field, enter admin_addUser_master.asp. Verify that the Form Elements area contains this text: userGroup updates column "userGroup" (Text).
With this information, you are telling Dreamweaver to write a SQL query that will update tbl_users' userGroup field with the information stored in the userGroup form element, in the row whose primary key matches the one retrieved in the rs_registeredUsers query.
Once users submit the form, they are redirected to admin_addUser_master.asp, where, as you'll recall, the summary lists each user's current user group, enabling users to make sure that the change went through.
ColdFusion Users Only: In the Update Record dialog, chose newland as the Data Source and tbl_users as the Update Table. In the Columns area, make sure that the following two statements appear: 'userID' Selects Record Using 'FORM.userID' as 'Numeric'; 'userGroup' Gets Value From 'FORM.userGroup' as 'Text'; and the rest say Does Not Get a Value. Lower in the dialog, in the After Updating, Go To field, enter admin_addUser_master.cfm. Make sure that Pass Original Query String is unchecked.
With this information, you are telling Dreamweaver to write a SQL query that will update tbl_users' userGroup column with the information stored in the userGroup form element, in the row whose primary key matches the one stored in the form's userID (hidden field) element.
Once users submit the form, they are redirected to admin_addUser_master.cfm, where, as you'll recall, the summary lists each user's current user group, enabling users to make sure that the change went through.
Save and upload the page. Then, test the page set, starting from the master page.
You should be able to select a user, change their status on the detail page, and see the change reflected when redirected to the master page. The application works to this point. There's still a problem with the ASP version, but ColdFusion users are finished with the lesson.
Once again, the login information is as follows:
Username: zfrome@starknet.com
Password: hypochondriac
ASP users: Once you've tested the page pairing once, go ahead and try it again. The second time you try it, you get an error message. The problem is easy to spotjust look at the URL. Somehow, the querystring contains userID=# twice. This is tripping up the ASP interpreter. Click the Back button, and you'll see that one instance of userID=7 is present on the master page. But that shouldn't be there. The master page is supposed to send the URL variable, but it is not supposed to have a URL variable of its own. Why is this happening? When the form is submitted on the detail page, it passes back a URL variable to the master page. In ColdFusion, a checkbox called Pass Original Query String lets you determine whether to pass the URL variable back or not: in ASP, however, Dreamweaver assumes you want the querystring to be passed, even though you don't.
There is no way to fix this problem in a dialog or wizard. You'll have to fix it in the code itself.
ASP Users Only: In admin_addUser_detail.asp, switch to code view. Look for a comment, 'append the query string to the redirect URL. Insert an apostrophe before the next seven lines to comment them out.
In my version of the page, the offending code begins in line 81. If you have trouble finding it, use Edit > Find.
You'll see a nested pair of If statements. These do the work of appending the querystring, so you want to deactivate them. You could just delete them, but it's safer to comment them out, just in case you need them at some later point.
Make sure you don't inadvertently comment out the third End If, because it belongs to the parent block of code, not the portion you are commenting out.
Once you've commented out these lines of code, test the page set again, multiple times. It should work as expected.


