Saving a Report
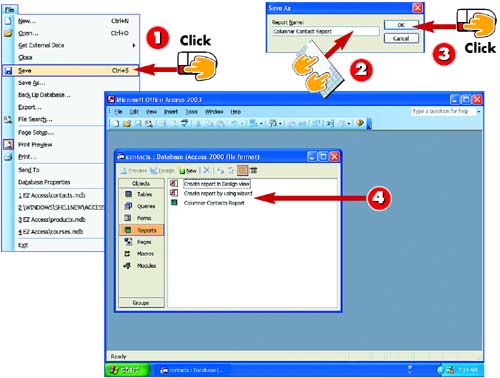

Open the File menu and choose Save. If you are saving changes to an existing report, the Save process is complete; if you are saving a report for the first time, proceed to step 2.

The Save As dialog box opens. Type a name for the report in the Report Name field.

Click OK.

The report is saved. When you close the report, it will be listed in the database window with the name you typed in step 2.
INTRODUCTIONWhen you create a report using the Report Wizard, it is saved automatically with the name you specify. If you create an AutoReport or a report from scratch (not covered in this book), however, you'll need to name and save it manually. In addition, you must save a report after making changes to the report's design. |
TIPUsing the Save As Command When you modify a report's design, the new version of the report replaces the report you started with. If you want to keep the original report, save the new report under a new name by using the File, Save As command. Type a new name. |
TIPSaving the Report If you prefer, you can click the Save button to save a report. If you try to close a report without saving first, you will be prompted to save; click Yes to save the report. |


