More Dimensions than a 2D Program Should Have
More Dimensions than a 2D Program Should Have
| New Feature? |
Illustrator CS adds 3D capabilities to what has been, for all drawing intents and illustration purposes, a 2D program. No longer are you limited to flat artwork with artist renditions of 3D that you’ve had to painstakingly create from scratch. Now you can generate true 3D objects (though you still have to move each of the 3D objects around in essentially two dimensions). |
You won’t find better, more comprehensive 3D functionality in any other 2D program. You will find better, more comprehensive 3D functionality in 3D software such as LightWave or Maya, but why spend loads of money and deal with a super steep learning curve when you’re probably just going to want the basics anyway? 3D software is primarily for 3D modeling, so you can create your own Shrek or Doom. The interesting thing about that is that those folks tend to use Illustrator for the basic designs and shapes that are later modeled with the high-end 3D software.
Another benefit is that 3D in Illustrator is easy. So easy I considered not writing this section. So easy that you’ll be creating 3D objects in, er, about one step. So easy that you’d expect the feature to be trying out for a spot as one of the floozies on The Bachelor. Okay, okay, nothing’s that easy. But 3D comes close.
What lovely extrusions you have
When people think of 3D, they usually think of extrusions. Of course, they think of those extrusions as 3D, not extrusions, or Adobe would’ve called the feature “extrusions and more.” Or something a little more snazzy. Extruding is the process of taking your artwork and giving it weight. Giving it depth. Giving it a 3D look. Figure BC14 shows some boring, regular old type next to amazingly compelling extruded type.
To extrude type, follow these steps:
-
Select the object you want to extrude.
You can extrude paths and type, but not pixels.
If you like, you can apply 3D effects to groups or layers, not just paths. 3D effects work like any other effect in that way.
-
Choose Effect→3D→Extrude & Bevel.
The 3D Options dialog box appears (shown in Figure BC15).
-
Click OK, and voil?! Your art is now 3D.
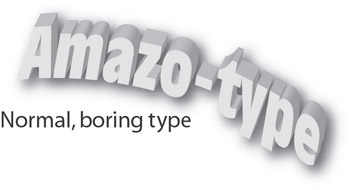
Figure BC14: Mild-mannered text and its super-powered 3D alter ego.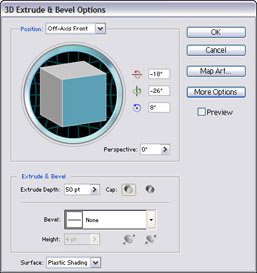
Figure BC15: The 3D Options dialog box.
Options? 3D is supposed to be easy, right?
You’re probably thinking to yourself, “Gee, self, why are all those funky controls in the dialog box if I don’t have to use ’em?” The secret is the title of the dialog box: It’s the 3D Options dialog box, which lets you change options for your 3D object. It’s Adobe’s way of making you less intimidated than you probably should be, considering the huge leap you just made going from 2D to 3D.
Before you start wiggling the controls, check the Preview check box. That allows you to see the results of your wiggling every time you release the mouse button (or choose a different control). You may have to move the dialog box out of the way in order for you to see your artwork. Here’s a breakdown of the controls and what they do, from top to bottom on the left side:
-
Position: Select one of these options to quickly rotate your artwork. Unless you’re really scared of the Big Cube option, or you need to get back from some rotation that is out of control, don’t bother with these, just play Spin the Cube.
-
The Big Cube: This rocks. For a seemingly tame cube, this is the probably the most important control in the whole dialog box. Place your cursor on a flat side of the cube, click and drag, and your artwork rotates along with the cube. When you release the mouse button (assuming you have the Preview check box checked), your artwork is redrawn at its new rotation. If you really want control over your artwork rotation, use the following techniques:
-
Single Axis Rotation: Place your cursor on the edge of any cube face, and the cursor changes to a cute little double-sided curved arrow. This arrow means you only rotate the artwork around that axis of the object. Try it; it’s very intuitive.
Tip? Hold down the Shift key and the cursor changes into a little double right angle arrow. When you click and drag with the Shift key pressed, it rotates around the Artboard x and y axes only.
-
Rotate like the Rotate tool: What if you just want to spin your artwork the same way the Illustrator Rotate tool rotates? Rotating this way is rotating around the z axis, the axis of the Artboard that starts behind the screen and ends between your eyes. To rotate around the z axis, click the outside round rim of the cube and drag.
-
-
3 Degrees of Rotation: Now imagine Kevin Bacon in the cube . . . the three little boxes with degrees in them are the rotation amount around each of the x, y, and z axes.
-
Perspective: This control simulates how close the camera is to the object. It doesn’t make the artwork bigger or smaller (that’s the confusing part), but instead just distorts it a little to simulate camera distance. The more you increase the perspective (drag it to the right), the more distorted objects look (and the closer the artwork seems to the camera). Figure BC16 shows the same 3D artwork with different perspective amounts.
-
Extrude Depth: This is how deep your artwork goes when you extrude it. The larger the number, the farther back the extrusion, and the thicker it appears.
Read on in the “Mr. Bevel-dere” section to find out about the bevel options in the 3D Options dialog box.

Figure BC16: Artwork at increasing perspective settings.
Mr. Bevel-dere
The ancient book of Chinese patterns has a quote I’m fond of repeating: “When art stale, spice with bevels.” But don’t wait until your art starts getting a little boring in order to add these edge enhancements. Illustrator ships with all sorts of bevels you can use now.
| Tip? |
While you probably apply bevels to artwork that’s extruded, you don’t have to; you can apply it to conventional, flat, plain-old-vanilla 2D artwork to give some pop to your masterpiece. |
To apply a bevel to selected artwork, open the 3D Options dialog box. If you’ve already applied an extrusion to your artwork, you can simply double-click the 3D Bevel & Extrude entry in the Appearance palette. If not, choose Effect→3D→Bevel & Extrude, and pick a bevel from the drop-down menu. As long as you have the Preview check box checked, you see the bevel you picked applied to the artwork instantly. Figure BC17 shows bevels applied to text to give a stately, important look.

Figure BC17: Look at the classy bevels on this text.
If you don’t want any extrusion or 3D rotation, set the Extrusion Depth to 0, and change the Rotation setting to the Front option. Then pick your bevel (remember to never pick your friend’s bevel), and set the depth of the bevel with the slider above it. Voil?! You beveled your artwork, as shown in Figure BC18.

Figure BC18: Flat, 2D artwork with just a hint of 3D bevel.
Revolving 2D into 3D
Extruding is the most common form of creating 3D from 2D, but much more interesting is revolving 2D art into 3D art.
No, no, you shouldn’t feel guilty about thinking that it sounds too confusing to be of any use to you. Revolving is a pretty strange concept. The closest real-world example to revolving is probably a pottery wheel, though Illustrator isn’t quite as messy and doesn’t require the Righteous Brothers to be singing in the background. Another example for you woodworker wannabe’s would be lathing; the same process that makes baseball bats, chair legs, and toothpicks.
Figure BC19 shows some examples of 2D artwork and the resulted revolved 3D art. These examples took just seconds to create using the Illustrator 3D controls.

Figure BC19: 2D artwork (left) is revolved into 3D artwork (right).
You create 3D evolved artwork in pretty much the same way you created 3D extruded artwork, except that you choose Effect→3D→Revolve. The Extrude section of the 3D Options dialog box is replaced with the Revolve section shown in Figure BC20.
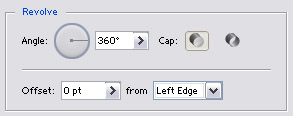
Figure BC20: The Revolve section of the 3D options dialog box.
The options here aren’t quite as straightforward as they could be:
-
Angle: This control sets the angle of the revolve. Normally the angle is 90?, which will spin the object around a vertical axis.
-
Amount: This control sets the amount of revolving. At 360 degrees (the default value), the object revolves completely around its left edge, making a complete circle (when viewed from the top). The more you lower the amount, the more the object changes: from a complete circle to something with a bite taken out of it, to a half circle, to a little pie wedge (again, viewed from the top).
-
Offset: This control lets you revolve around a different location. The farther the offset, the more of a “hole” you’ll see in objects rotated 360 degrees.
When revolving, you’ll notice that it’s a little confusing to determine exactly which amount or angle to use in order to get the desired result. Use the Preview check box, which gives you an up-to-date outlook on exactly what you’re changing. Also, don’t forget to use the Big Cube option to rotate your artwork into a position where you can see it; oftentimes the result is hidden because of the angle you’re viewing.
Lighting and surface qualities
If you haven’t noticed by now, overwhelmed as you may be by the various options and controls for extrusions and revolves, a cute little button called More Options resides above the Preview check box. Click this guy and not only does the button change to read “Fewer Options” (by far the least impressive of the button’s functions), but it also opens a whole new set of options and controls at the bottom of the dialog box, including a snazzy-looking sphere and a bunch of indecipherable numbers.
These options control lighting and surface properties; they may seem a bit daunting at first, but the important items (there are only two of ’em), are really super-easy to use.
Super-easy setting #1: Surface
The Surface drop-down menu contains controls for customizing the surface type. Your choices are:
-
Plastic Shading (the default): This option makes your artwork look like it’s right out of the preschool row in Toys-R-Us. Shiny, happy, glossy-looking plastic art.
-
Wireframe: This option is the 3D guts view. Each piece of the 3D object is outlined and shown. Great for technical-looking pieces, such as the one in Figure BC21.
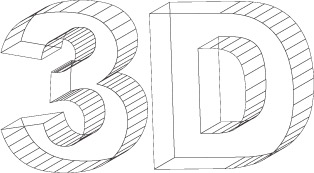
Figure BC21: This is so techy, and you can create it in mere seconds! -
No Shading: Possibly the least-used of the surface options, the no Shading option generates artwork that’s the exact same color as the original 2D artwork. Ick.
-
Diffuse Shading: Soft, smooth shading that gradually moves from bright light to darker shading. Figure BC22 shows the difference between plastic and diffuse shading.
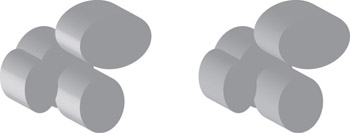
Figure BC22: The same 3D artwork with plastic (left) and diffuse (right) shading.
| Tip? |
Surface properties, specifically Plastic and Diffuse shading, need curves to show any half-decent results. If you try these settings on an extruded square or star, you’ll be a little disappointed. Try them out on revolved artwork, curvy artwork you’ve extruded, or any artwork with curved bevels. |
Super-easy setting #2: Lights
See the pretty sphere? It’s the place where you can mess around with lighting. The sphere represents your artwork (kind of like the cube that represents it for rotation). The little square with a circle in it is a light source, shining on your new 3D artwork. Think of this light source as a 100-watt incandescent bulb stuck in Uncle Fester’s mouth, the expensive soft-white, natural light type that sets you back about $4 a pop.
Move Uncle Fester’s head around by clicking and dragging the little circle-in-a-square thingy, and when you release the mouse button, your artwork changes appearance, as the light is hitting it at a different angle.
| Tip? |
If you’re really super-cool, need to impress your been-there, seen-it-all friends, and your computer isn’t a 1992 refit reject from some government agency, you can press the Shift key as you move around the light source. Watch the artwork as you do this; it’ll update in real time! Oooooh. |
If that were all you could do with lights and surfaces, it would be enough for your already high expectations. But the wizards in the Adobe think tanks (it keeps most engineers in sensory-depravation chambers, not because doing so makes them write better code, but because marketing types need something to laugh about during their four martini lunches) have added all sorts of other abilities, from adding multiple lights to controlling the glossiness of your plastic. Twiddle the controls a bit, and you radically change the appearance of your artwork, such as the examples in Figure BC23.
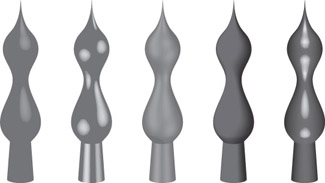
Figure BC23: No, it didn’t take hours to create all these different pieces of art . . . just a few seconds applying different lighting and surface effects from the 3D Options dialog box.
Wrapping art around 3D art
Okay, so you’ve made your donut, and you’d like to put sprinkles on it. Or you’ve created fuzzy dice, but they aren’t fuzzy (and they don’t have big ole dots yet).
What can you do? Draw them on the edges manually? Sure, if you majored in Perspectives in college. Assuming you didn’t, however, you’ll probably like the ability of Illustrator to place artwork on the sides of 3D objects. Illustrator does this through symbols; anything you can make as a symbol can be applied to any side of a 3D object. If you can make fuzzy squares with big ole dots on them, you can apply them to extruded squares. You need to supply your own El Camino, however.
The best way to apply artwork to 3D objects is to make the 3D object first, without the artwork. Doing everything at once is possible, but you have to keep track of too many things to be very productive. In the case of the fuzzy (to be) dice, make your cube first by extruding a square (extrude it exactly the same amount as the width or height; they should be the same). Then make six fuzzy sides (if you’re fuzz-challenged, just make a dot pattern). Sure, you can get away with three sides, because that’s all you can see anyway, but what if you want a pair of fuzzy dice? You’ll probably want to show different sides of each die. You don’t want people laughing at your fuzzy dice, do you?
Each fuzzy side needs to be made into a symbol (drag the art into the Symbols palette to do this). Then select the cube, double-click the 3D Extrude & Bevel entry in the Appearance palette, and click the Map Art button, at which time the Map Art dialog box appears, as shown in Figure BC24.
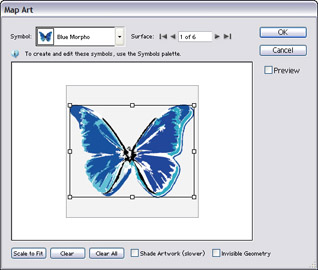
Figure BC24: The Map Art dialog box when you have an extruded square selected.
Slowly, methodically choose a side, and then choose a symbol from the menu. The symbol is applied to your artwork. Change sides and repeat until you’ve spotted your die, then click OK and bask in the glory of your new creation, like the one shown in Figure BC25.
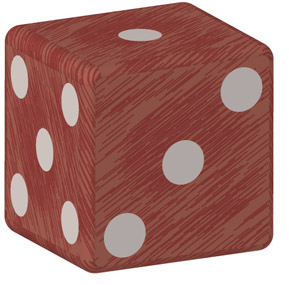
Figure BC25: Fuzzy dice straight from Illustrator. But you can tell your friends you picked them up on that trip over the border.
| Tip? |
Try adding other cool effects to 3D, such as warps or transparency, for some really amazing effects. Figure BC26 shows the dice I created as official Las Vegas-style craps dice, with completely transparent insides (to see the dots on the hidden sides of the dice, I checked the Show Hidden Faces option at the bottom of the 3D Options dialog box. 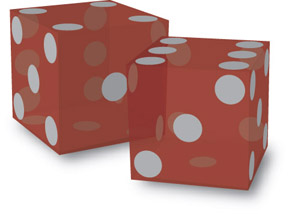
Figure BC26: Official Vegas-style dice, with classic razor edges. |


