Blending: The Magic Transformation
Blending: The Magic Transformation
This section covers what may well be the oddest feature in Illustrator. Illustrator can blend one path into another. For instance, you can blend the shape of a fish into a lowercase letter f. The result is a series of paths that slowly transform from one path into another. In addition to the shape changing from one path to another, the color (and style, if one exists) changes as well.
| Technical Stuff? |
Sound familiar? No surprise. The results look a lot like the morphing effect you see in every werewolf-vampire-alien-shapeshifter movie made in the last ten years. |
Only paths can be blended together. The paths can be open (lines, curves) or closed (shapes such as circles and squares). They can also contain either solid colors or gradients. You can select any number of paths (no more than three, though, for the best results) and blend them together, as shown in Figure 12-15.
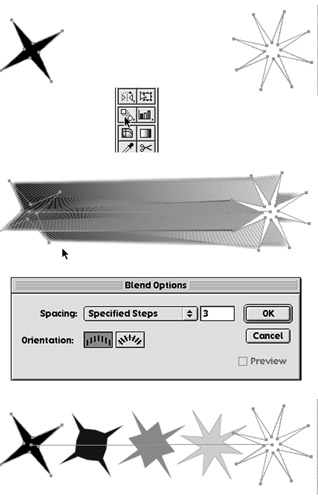
Figure 12-15: Creating a blend between two paths.
To create a blend that takes the artwork from one path to another, just follow these steps:
-
Create two paths on opposite sides of the document.
-
Choose the Blend tool from the Toolbox.
-
Click one path, click the other path, and watch the blend appear.
The number of objects between the two original paths depends on how different the colors are.
-
(Optional) To specify the number of steps between the paths, double-click the Blend tool.
-
In the Blend Options dialog box that appears, select Specified Steps from the Spacing drop-down menu and enter the number of steps you want between the two paths. Click OK.
Illustrator creates the number of objects you specify between the two original paths.
Other options are available in the Blend Options dialog box besides the Specified Steps option. The Smooth Color option lets Illustrator automatically calculate the number of steps for the blend, which allows for a smooth transition of color and shapes. The Specified Distance option specifies the distance between steps in the blend based on the edge of one object to the edge of the next object. You can also specify the orientation of your blend — either with the Align to Page orientation or the Align to Path orientation. The icons for each give you a visual of each orientation.
| Tip? |
You can also edit your blends with selection tools, such as the Arrow or Lasso tools, or with the Rotate or Scale tools. If the blend still doesn’t meet your expectations as you make your edits, you can undo a blend by choosing Object→Blend→Release. |


