Introducing the Strange Land of Type
Introducing the Strange Land of Type
Although much of Illustrator may seem new and different, it describes type with a language steeped in centuries of tradition (not to mention 17 years of Illustrator history), so some of the terms may sound strange.
Fonts, typefaces, and font families
You often hear these terms used interchangeably. Fonts, typefaces, and font families actually have distinct meanings; for this book’s purposes, you deal primarily with fonts. Fonts are sets of common letterforms that give consistent, distinct designs to the entire alphabet, all the numbers, and a boatload of symbols. Figure 14-6 shows a variety of fonts.
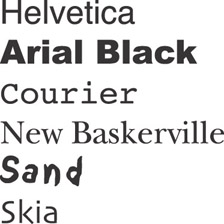
Figure 14-6: Several different fonts.
You change fonts in Illustrator quite easily, as shown in Figure 14-7, by following these steps:
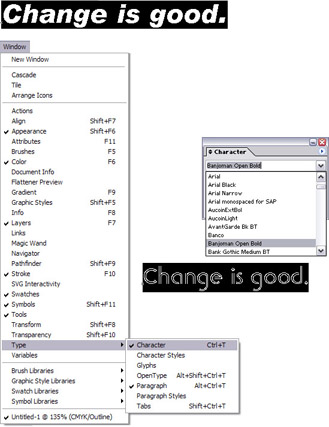
Figure 14-7: Changing fonts in Illustrator.
-
Using either the Type tool or a selection tool, select the type you want to modify.
-
Choose Window→Type→Character.
The Character palette appears. The family name of the currently selected font appears at the upper left of the Character palette. Beside the Font Family name is the Font Style box, with a downward-pointing triangle just to the right.
-
Click the downward-pointing triangle next to the Font Style box.
A pop-up menu presents you with a list of all the fonts on your computer.
-
Pick a font from the list and click its name.
After you release the mouse button, the selected text changes to the font you chose.
| Technical Stuff? |
You may be miffed to find that Illustrator doesn’t have buttons for making fonts bold and italic. Programs with such features are usually faking it, as not every font family has genuine bold and italic versions. If a program takes the non-italic version and tilts it (or the non-bold version and thickens it), the resulting false impression can waste money. The faux bold and italics may look okay on-screen — and even print out okay on an inkjet printer. But when an imagesetter (a professional high-resolution printer) rejects them as fake, they show up on the page as the ordinary non-bold, non-italic fonts that they are — after you had costly films made. |
As you peruse the list of fonts, notice that the font styles appear in submenus of the main list. This feature shows you related versions of a particular font. For instance, Figure 14-8 shows samples of three font styles in the same family. Top to bottom, they are Times Roman, Times Bold, and Times Italic (first two words of the third line). All are in the same submenu of the Times menu item. Font styles in the same font family have a similar look and work well together.
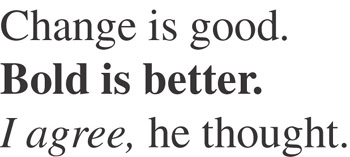
Figure 14-8: These font styles are part of the Times font family and look good placed together.
Serif and sans serif
Fonts are generally divided into two categories: serif and sans serif. Serif fonts have little doohickeys called serifs on the tips of letters and numbers; sans serif fonts don’t have them (in this case, sans means “not gonna happen here”). Figure 14-9 shows examples of serif and sans serif fonts.

Figure 14-9: Serif (top; serifs are circled) and sans serif (bottom) fonts.
Why choose serif or sans serif? Traditionally, serif fonts are used for large areas of text because the serifs make the text easier to read. Sans serif fonts are used for headlines because they stand out more boldly. However, as wider ranges of fonts have become available to wider ranges of users, more people are breaking the traditional font-choice rules. Traditional usage isn’t always the case anymore. Books and magazines still use serif fonts (more than sans serif fonts) for long passages of text, but you can find many exceptions to the rule. Sans serif type is often easier to read on-screen; those little serifs are frequently just too small to display properly on low-resolution computer screens.
| Remember? |
When you’re creating for print, a wise idea is to print your Illustrator text throughout the creative process. The printed page can differ slightly from what you see on-screen. If you’re creating text for Web graphics, consider yourself lucky; when you have your graphics and the text looking good on-screen, mission accomplished! |
| Tip? |
To make Illustrator show as closely as possible what your text will look like on the Web, choose View→Pixel Preview. |
The biggest Don’t Do It that I can think of
Back in 1987, when Illustrator and PageMaker just hit the scene, many computer users without an artistic bone in their bodies created documents and graphics. They got carried away with the computer’s magnificent ability to mix and match fonts. The printed results often looked short of professional: busy, trashy, and hard to read. Lately, font madness has struck again — with Web pages — so your loyal author makes this impassioned plea:
Don’t use too many fonts on the same page the way I just did.
What’s too many? Well, the awful no-no I just inflicted on the page has five. If you run out of fingers (on one hand) while counting fonts, you have too many. The classic limit is three fonts (including any bold or italic versions of the main font you’re using).


