Exploring the Illustrator Workspace
Exploring the Illustrator Workspace
Between figuring out what the 250+ menu items actually do and rearranging palettes (until you have a tiny little area on your document in which you can actually work), you may find the Illustrator environment a bit daunting. (If you do, you’re far from alone.) The next sections are an overview of all the stuff that’s preventing you from getting any work done. (That stuff is what the geeks call the UI — pronounced you eye — for user interface.)
A graphic handyman’s Toolbox
The Illustrator Toolbox (that alien artifact in Figure 1-3) is the place that most people start when they use Illustrator. After showing you 24 tools, 6 odd-looking buttons, and a gang of giant square things, the Toolbox pretends that’s all there is to it. Actually, the Toolbox has over 50 hidden tools. Call up most tools in Illustrator by clicking (once) the tool you want in the Toolbox. The cursor then changes to either something that looks like the tool, or in the case of special tools (Rectangle, Ellipse, and others) a cross-hair cursor.
The tools live in toolslots, which are subdivisions within the Toolbox. Many toolslots contain more than one tool, as indicated by a small black arrow in the bottom-right corner of the toolslot. To access a hidden tool, click and hold the mouse pointer on a tool in its toolslot. You then see a bunch of other (usually related) tools materialize by the toolslot that you clicked (as shown with the Pen tool in Figure 1-3). Use those other tools by dragging to the tool you want to use and releasing the mouse button.

Figure 1-3: The Illustrator Toolbox; click and hold the pointer on ?a toolslot ?to display ?all the tools.
| Tip? |
Drag over to the little bar to the right of the hidden tools in the toolslot and let go of the mouse button when the little bar becomes highlighted (refer to Figure 1-3). A separate little window appears containing all the tools from the toolslot. You can place this window anywhere on the screen. This procedure can save your sanity if you’re constantly switching between two tools that share a toolslot. To get rid of this toolslot window, click the X (Windows) or the tiny white Close box (Mac) in its upper-left corner. |
| Tip? |
When you pause the mouse pointer over any tool, the name of the tool appears, followed by a letter. Well, no, the letters aren’t grades given to the tools for their usefulness; the letters let you know which keys to press if you want quick access to the tools. (For instance, press the P key on your keyboard to get the Pen tool or R to get the Rotate tool.) |
As you gaze at the Toolbox, notice that it doesn’t have a Close or Expand box along its top. One possible explanation for this is that you go to the Toolbox for just about everything you do in Illustrator, and it’s almost impossible to work without it. If you really want to, though, you can hide the Toolbox by selecting Hide Tools from the Window menu at the top of the screen. To bring back the Toolbox, go to the Window menu again and select Show Tools.
| Tip? |
You can hide the Toolbox temporarily — along with your palettes — by pressing the Tab key. Although this feature can be unsettling if you don’t know about it (if you hit the Tab key by accident, everything disappears except your graphics and the menu bar!), it’s still mighty useful — especially if you’re working on a small computer screen. You can work with everything hidden, hit the Tab key when you need to, select the tool or palette item you need, and get back to work unfettered by the things you aren’t using. This approach is a lot faster than selecting Show or Hide from the Window menu whenever you want to do something different. |
Palettes to suit any artist
Illustrator has a ton of palettes. You may think of a palette as something more closely associated with a painter than an illustrator, but nonetheless, Illustrator has about 30 of them. As with a painter’s palette that holds the paints she uses most, an Illustrator palette provides quick access to the most frequently used commands and features. The contents of palettes are organized according to what they do. The Character palette contains commands to format individual pieces or big chunks of text, and the Color palette lets you create and change colors. Although Illustrator has dozens of palettes, you rarely need to have them all open at once. When entering text, for example, you want the Character palette open, but you probably don’t need the Gradient palette open because the Gradient palette controls only gradients.
You open a palette by choosing it as a menu item. These all live in the Window menu (such as Window→Colors). To close a palette, click the X (Windows) or the tiny white box (Mac) in its upper-left corner.
| Tip? |
Fortunately, Illustrator can both tab and dock palettes to keep them more organized, giving you a wee bit of space in which you can actually draw and edit your artwork. Tabbing lets you stack palettes in one area so they overlap like index cards. Docking connects the top of one palette to the bottom of another so that both palettes are visible but take up as little space as possible. |
By default, Illustrator displays the palettes shown in Figure 1-4. Notice that some of the palettes are grouped into sets and offer you several tabs. (For instance, the Styles, Swatches, Brushes, and Symbols palettes are tabbed together in one set.) Initially, you see only the Styles palette; the Swatches, Brushes, and Symbols palettes are hidden behind the Styles palette. To see either of those palettes, click the tab for the one you want to view.

Figure 1-4: Palettes ?are tabbed together in a set.
You can combine palettes by any method that you feel works for you. To move a palette from one set to another, click and drag that palette’s tab from one set into another — or out by itself (which creates a new set). Illustrator doesn’t limit you; you can combine any palette with any set. You can even put all of Illustrator’s palettes into one set if you really want to — but I don’t advise doing so; the tabs would all overlap so you couldn’t tell what’s what.
Another way to combine palettes is by docking them together, as shown in Figure 1-5. Unlike tabbed palettes, docked palettes are all out there in plain sight; you can see more than one palette in a set at the same time. To dock one palette to another, drag the tab of the first palette to the bottom of the other palette. A dark line appears on the bottom of the second palette when it’s in docking position. When you release the mouse button, the first palette docks with the second one.
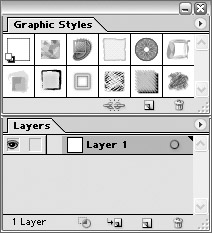
Figure 1-5: The Layers palette docked to the Styles palette.
Many Illustrator palettes have their own menus, which pop up when you click the triangle in the upper-right corner of the palette, as shown in Figure 1-6.
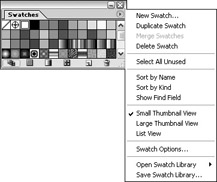
Figure 1-6: Palettes also have their own menus.
Items in the palettes’ pop-up menus relate specifically to each palette. This makes them easy to ignore and easy to figure out — after you master the ?individual palette.
Menus with the finest cuisine
Illustrator menus are organized fairly well. Some menus are immediately ?obvious. You find commands having to do with type under the Type menu and commands for viewing your document under the View menu. Other menus are a little less intuitive and make sense only after you start using them. For instance, after you realize that any one on-screen “thing” in Illustrator is an object, you discover that items in the Object menu relate to objects. Other menus take a little more work and experimentation to understand. For instance, the Filter menu and the Effects menu have many items that appear identical, yet do very different things. Believe it or not, all these menus are arranged to make figuring out and using Illustrator as easy as possible.
To use an item in a menu, drag down to that item and release. Something should happen when you do that (no explosions or tsunamis — as far as I know), depending on which menu item you select. Even the way a menu item appears on a menu can be a handy tip — for example, consider the following characteristics:
-
Submenus: Many of Illustrator’s menus have several submenus in them, indicated by a little triangle to the right of the menu item. To access a menu item in a submenu, drag down to the title of the submenu and then over to the item you want to use. (See Figure 1-7.)
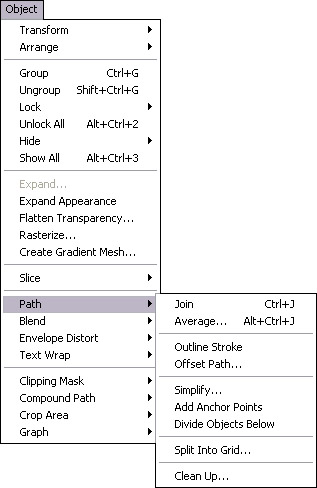
Figure 1-7: The Path submenu in the Object menu. -
Keyboard commands: Most menu items in Illustrator have keyboard shortcuts (key combinations listed at the right) that can activate them.
-
More info needed: An ellipsis (. . .) indicates that when you click the item, a dialog box appears, requesting additional input from you.
-
Unavailable commands: A grayed-out menu item means Illustrator won’t let you do anything with that item just now.
Mac and Windows issues spring eternal
Okay, I know some loyalties in this area are fierce — can’t we all just get along for a while? Regardless of which system you use or like, you work in Illustrator pretty much the same way. A few little differences are important enough to mention, however, especially if you jump between the two systems:
-
The .ai extension: Windows users often need filename extensions after their filenames or the system refuses to look at the files. The Illustrator file extension is .ai. That’s right, as in aieee! but without the eee!. Most file types (on Windows systems) have three-letter extensions; Illustrator uses two. Windows folks should save Illustrator documents with the .ai extension for maximum compatibility with all flavors of Windows. Having the wrong extension on the file can cause problems. If you were to put .aif on there, for example, Windows would try to open the file as a sound file, fail, and give you an error message!
Tip? Windows users are accustomed to using two- and three-letter filename extensions. Mac users don’t have to, but they really should get in the habit of doing so. For starters, that keeps the peace when you send files and lets you instantly identify what the file is. Illustrator lets you save files in an alphabet soup of file formats, such as PDF (.pdf), TIFF (.tif), EPS (.eps), or JPEG (.jpg). Each of these formats has its own unique properties and purposes. When you see .eps on a file, chances are good that it’s a graphic created for use in a page layout program. When you see .gif, you know it’s a graphic created for display on the Web. File extensions can tell you a lot about your files even before you open them.
-
Right-click versus Ctrl+click: While in Illustrator, Windows users can right-click most places in Illustrator to display a contextual menu (see Figure 1-8). Mac users, who don’t have a right mouse button, press the Ctrl key while clicking the mouse button. Contextual menus (clever creatures!) are context-sensitive: They recognize what the mouse is near when you click and give you options you can apply . . . the following, for example:
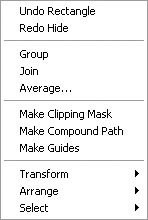
Figure 1-8: A contextual menu appears when you Ctrl + Click (Mac) or right-click(Windows).-
Right-click (or Ctrl+click) the Ruler, and a context menu shows up, offering to help you change the Ruler’s unit of measurement.
-
Right-click (or Ctrl+click) text, and you can change the font, size, and a slew of other options.
-
Click a path, and up come the options related to paths, and so on.
Tip? All the items found in contextual menus appear in the regular menus, too, so you never really have to use contextual menus. They’re among those little luxuries (like a steering-wheel-warmer on a cold day) that make Illustrator so nice to use.
-
-
Performance: As of 2003, Windows systems have taken a decisive lead over Macs when it comes to performance. The difference is most apparent with graphics applications such as Photoshop and Illustrator, but you’ll notice it with other applications as well. If you’re thinking of purchasing a new system, and speed and responsiveness is important (or at least more important than the feel of the OS), I suggest getting a zippy PC over a (comparably) sluggish Mac.


