Entering Detailed Contact Information
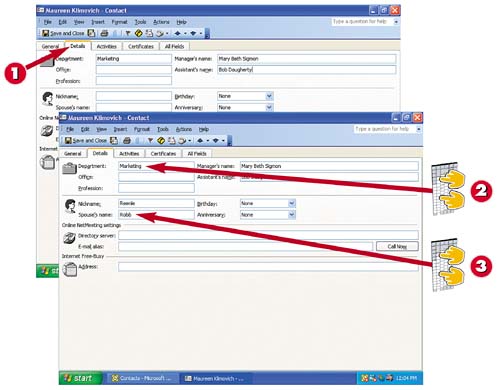

After you've created a new contact or opened an existing one, click the Details tab in the Contact window.

Type professional information about the contact, such as his or her department, office, profession, manager's name, and assistant's name.

Enter any personal information about the contact, such as his or her nickname and the name of his or her spouse.
INTRODUCTION
If you use Outlook simply to send and receive e-mail, you may not want to bother completing all the available fields in the Contact window. On the other hand, if you use Outlook as a contact manager, you should take a look at all the types of information you can store about each contact.
TIP
Entering Contacts from the Same Company
If several of your contacts work for the same company, you can use a shortcut to enter the company information when creating new contacts. To do so, open a Contact window that already contains the company information. Then, in the Contact window's menu bar, choose Actions, New Contact from Same Company. Outlook will create a new record but complete the company information for you.
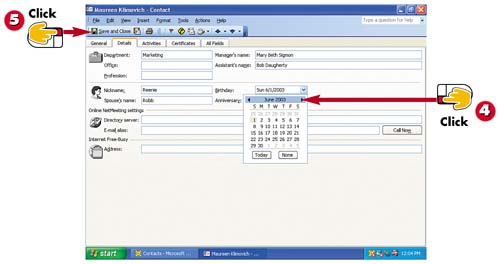

Type the contact's birthday and anniversary in the appropriate field, or click the down-arrow button next to the field and use the minicalendar to locate the date.

Click Save and Close to close the contact window.
TIPUsing Other Tabs You can use the Activities tab to track a contact's activities (see "Journaling Activities for a Contact" later in this task for more information) . Use the Certificates tab to set up security options for encrypted messages, and use All Fields to create a customized tab listing the fields you want to include on the tab. You can select which fields to include from a drop-down list. |


