Setting Up a Calendar for Printing
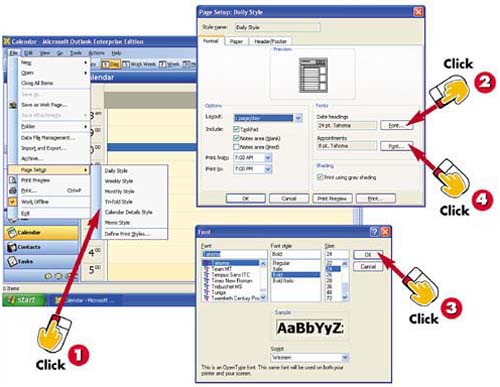

Open the File menu and choose Page Setup. A submenu containing various calendar styles appears; choose the style you want to use for your printout.

To change the font for the date headings, click the Font button to the right of the Date Headings field.

The Font dialog box opens. Choose a font, style, and size for the date headings, and click OK.

Back in the Page Setup dialog box, change the font for the appointments by clicking the Font button to the right of the Appointments field; repeat step 3 to assign the desired fonts.
INTRODUCTION
There may be times when you want to print your calendar. Before you print, however, use Outlook's Page Setup options to specify how the printout will look.
TIP
Understanding the Options
The Page Setup options vary depending on the selected printout style. If you are unsure about an option, right-click it and select What's This? to view a brief description.
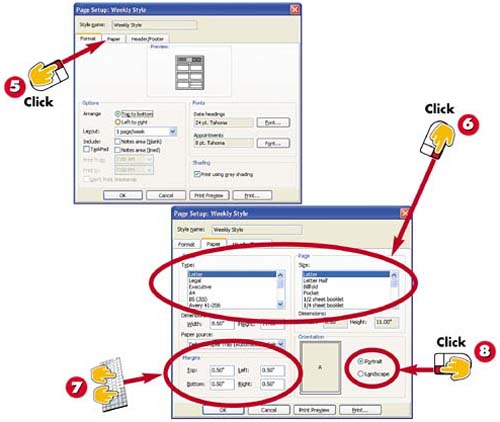

To print a calendar on special paper or change the orientation to better suit the data, click the Paper tab in the Page Setup dialog box.

Using the Type and Size lists, select from any number of available paper types and sizes.

To change the margins, type new values in the Top, Bottom, Left, or Right fields.

To change the page's orientation, click the Landscape or Portrait option button. When you're finished, click OK.
TIPPreviewing and Printing You can preview or print the Calendar directly from the Page Setup dialog box by clicking the Print Preview or Print button. |
TIPIncluding Headers and Footers You can add a header or a footer to the printout using the Page Setup dialog box's Header/Footer tab. Specify where the text should appear (at the left margin, centered, or at the right margin) and type the text to include. You can also, if you want, use the handy buttons to insert common header and footer items such as page numbers or dates. |


