Task 5: Defragmenting a Disk
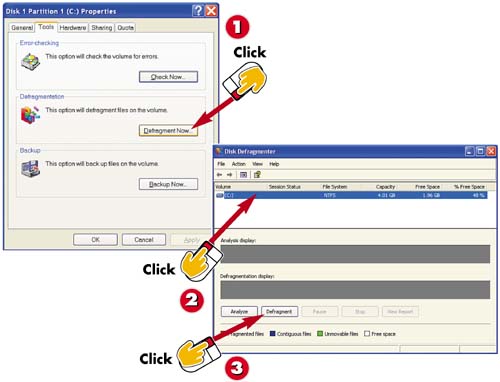

Click the Defragment Now button in the Tools tab of the Properties dialog box for the disk you want to scan. (Refer to Task 2 for help opening the Properties dialog box.)

Click the drive you want to defragment to select it.

Click the Defragment button.
INTRODUCTION
When a file is stored on your hard drive, Windows places as much of the file as possible in the first available section (called a cluster), and then goes to the next cluster to put the next part of the file. Over time, your disk files may become fragmented. To help prevent potential problems with fragmented files, you can defragment your disk, putting files in clusters as close to each other as possible. Defragmenting your disk is a general-maintenance job that you should perform every few months for best results.
TIP
Creating a Restore Point
Be careful when defragmenting. You might want to create a restore point first so that you can restore your system to its pre-defragment state in the event of a problem. See Task 10 in this part about creating restore points.
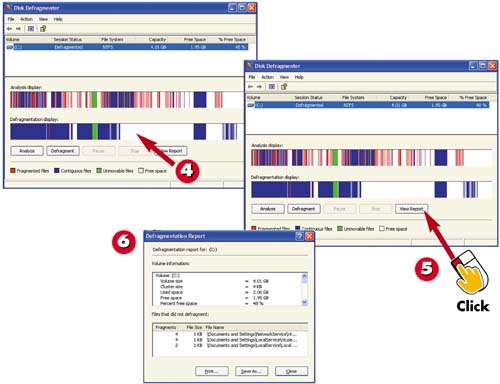

Disk Defragmenter's progress is indicated by the progress bar in the Disk Defragmenter window.

When the process completes, Disk Defragmenter displays the results. Click View Report.

The Defragmentation Report dialog box displays detailed information about the disk that was defragmented.
TIPAnalyzing First It's a good idea to analyze your disk before defragmenting it. Doing so enables you to see how fragmented the disk is, so you can decide whether you want to defragment. |
TIPFree Disk Space In order for Disk Defragmenter to completely defragment your disk, the disk should have at least 15% free space. If the disk has less free space, it will be only partially defragmented. |
TIPLogging On As Administrator You must be logged on as an administrator or a member of the Administrators group in order to complete this procedure. |


