Task 11: Setting Up a Scanner
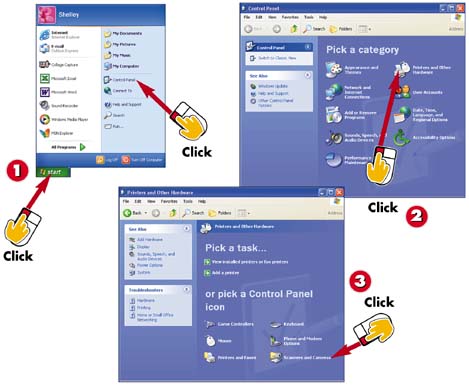

Click Start and then click Control Panel.

Click Printers and Other Hardware.

Click the Scanners and Cameras Control Panel icon.
INTRODUCTION
If you have a scanner, you can set it up and then use it to scan documents and illustrations. When you connect a scanner, Windows XP should query the scanner and then prompt you to install the proper driver (the scanner file that tells Windows about the scanner and how it works). If this automatic set up does not occur, you can use the Add Device wizard to set up the scanner.
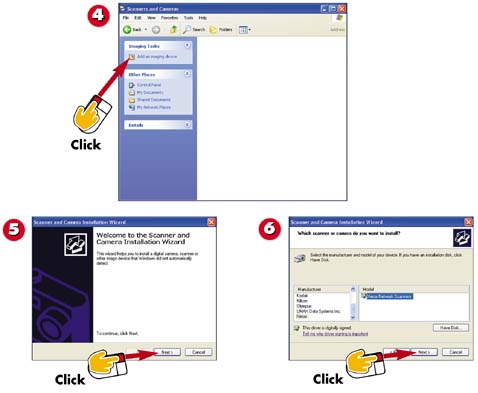

Click the Add an imaging device link to start the Scanner and Camera Installation Wizard.

Click Next to move from the welcome screen to the first step.

Select your scanner manufacturer in the list on the left. Then select your particular scanner from the list on the right. Click Next.
TIP
Automatic Installation
You will know if Windows XP automatically located your scanner because a status bar message will appear listing the new hardware (scanner). You can then click OK to have Windows install the driver for the hardware.
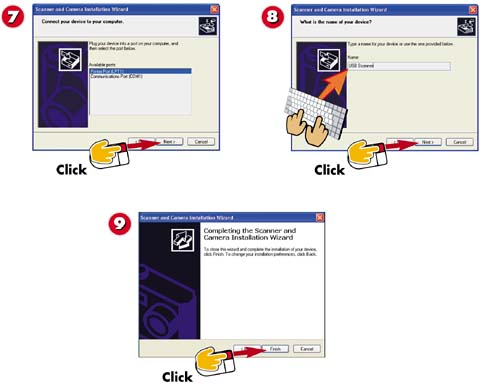

Select the port to which the scanner is connected and click Next.

Type a name for the scanner and click Next.

Click Finish to install the new scanner and its appropriate device driver.
TIPHow Do I Scan? The steps for actually scanning a document vary depending on the scanner and the scanner software, so you need to consult your scanner documentation for help on scanning. |


