Controlling Colors
Without color, your drawing objects are merely outlines. Word enables you to choose from a full range of colors?including shades of gray?to fill your objects, change your borders, and modify your text. In addition, you can fill your shapes with multicolor gradient blends, preset textures, and even user-selectable pictures.
CAUTION
Not all printers and monitors accurately reproduce the colors you choose. If accurate color is important, print a test copy, or display a test file using the monitor/printer combination where you expect your document to be viewed.
Changing Fills and Line Colors
Shapes you create with Word's drawing tools (except for lines and arrows) have two parts that can be colored. Although the interior fill color is the most obvious, you can also control the border color separately.
The easiest way to change a fill or line color is by clicking the correct button on the Drawing toolbar. The Fill Color and Line Color buttons both have option arrows that open similar Color menus with 40 color swatches and extended options. Click any of the onscreen colors to change either the fill or the line color of your selected drawing object. Clicking the No Fill or No Line options makes those respective choices transparent.
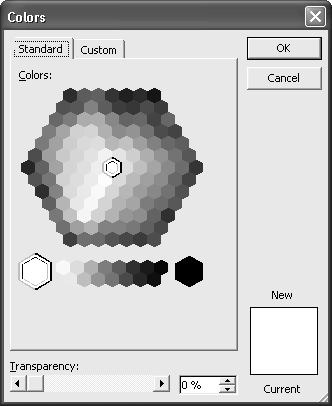
If you choose More Fill Colors from the Fill Color button, or More Line Colors from the Line Color button, the Colors dialog box appears (see Figure 14.14). The Standard tab displays a default color palette in a hexagon shape, as well as a 16-step grayscale blend between black and white.
Figure 14.14. Choosing a color from the Standard color palette.
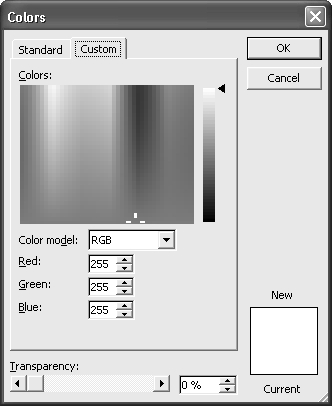
If your color palette is set to 16- or 32-bit color (also called High Color or True Color), you can use the Custom tab shown in Figure 14.15. This tab allows you to select a color that isn't in Word's standard palette.
Figure 14.15. Using the Custom tab of the Colors dialog box, you can choose any color in the RGB or HSL color space.
Word 2003 supports two color models?formal descriptions of how human beings perceive color. The first, RGB, specifies color by how much red, green, and blue are present. The second color model, HSL, measures color by hue, saturation, and luminance. HSL and RGB are actually quite similar, and both are designed primarily for documents that will be displayed onscreen. HSL is generally viewed as more intuitive; RGB is more widely adopted. When you choose a color model, the appropriate settings for that model appear.
Word does not provide built-in support for the CMYK and PANTONE color models that are typically used for professional print production.
If you want to work with HSL, choose HSL from the Color Model drop-down box of the Colors dialog box. Click anywhere in the large rectangular Colors area to choose a basic color. (This sets Hue and Saturation.) Then, select its intensity (Luminance) by dragging the arrow on the long vertical strip on the right.
Or, if you know the precise HSL or RGB settings you want, you can enter them in the Hue, Saturation, and Luminance or Red, Green, and Blue spin boxes directly.
TIP
If you've worked hard to get a color just the way you want it, and you want to use the same color in another drawing object, here's a shortcut.
Select the shape whose color you want to match. Click Format Painter on the Standard toolbar. Click the second shape. The lines and colors on the first shape now appear on the second.
Adding Fill Effects to Your Shapes
You can add fancy backgrounds to shapes you create in Word. These include gradients, textures, patterns, and even pictures. Word refers to these backgrounds as fill effects. To add a fill effect to a shape, first select the shape. Then, click the down arrow next to the Fill Color button on the Drawing toolbar and click Fill Effects. The Fill Effects dialog box appears; from here, you can work with all of Word's fill effects.
Using Gradients
A gradient is an area of color that moves from dark to light, or from one color to another. To work with gradients, choose the Gradient tab of the Fill Effects dialog box (see Figure 14.16) to select?or custom-blend?a special gradient.
Figure 14.16. Choosing a gradient from the Gradient tab of the Fill Effects dialog box.
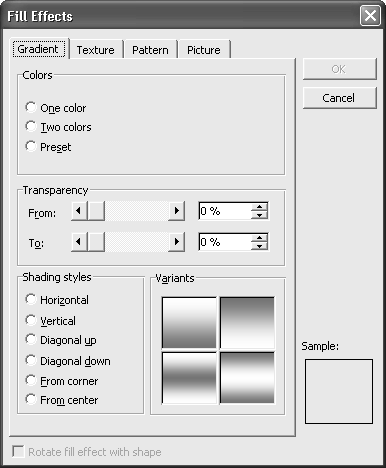
You can choose whether your gradients should contain one color or two; if you choose two colors, you can specify which colors you want. You can specify how the gradients change: from top to bottom (Horizontal), from left to right (Vertical), diagonally, from the corner, or from the center. Try experimenting?each option offers a different, interesting effect.
You can also choose from among a series of preset gradients, designed to communicate a certain mood. These include Early Sunset, Horizon, Desert, Rainbow, Calm Water, Gold, Brass, Chrome, and several others.
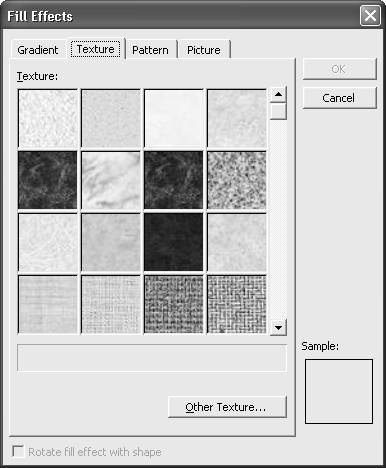
Using Textures
Word also provides 24 textures you can place in a shape you've created. To browse them, click the Texture tab of the Fill Effects dialog box (see Figure 14.17). Click a texture and click OK.
Figure 14.17. Choosing a texture from the Texture tab of the Fill Effects dialog box.
TIP
You can use any bitmapped image as a texture. To do so, display the Texture tab of the Fill Effects dialog box, and click Other Texture. The Select Texture dialog box appears. Browse to the image you want to use, and click Insert. The image now appears as a choice in the Texture list. Select it, and click OK.
Using Patterns
Word also provides 48 patterns you can use in any shape you create. As with other fill effects, be careful?lest you create a garish effect. Used with care, though, patterns can add visual interest and help you call attention to specific elements of your drawing.
To browse Word's patterns, display the Fill Effects dialog box and click the Pattern tab.
By default, patterns are displayed in the fill color of the object you've selected. However, you can choose from Word's entire color palette for both the background and the foreground colors. Click the down arrow under Foreground or Background to change the color; an updated sample appears at the right.
Figure 14.18 shows one of Word's built-in clip art images, made more striking through the use of a white-on-black pattern.
Figure 14.18. Using a pattern to add drama.

Inserting Pictures into Your Shapes
Thus far, you've learned how to make your shapes more attractive using gradients, textures, and patterns. When even these options aren't sufficient, Word also allows you to insert pictures in shapes. To insert a picture into a shape, carry out these instructions:
Select the shape.
Click the down arrow on the Fill Color button and choose Fill Effects.
Click on the Picture tab of the Fill Effects dialog box.
Click Select Picture. The Select Picture dialog box opens.
Browse to and select the picture you want.
Click Insert to close the Select Picture dialog box.
If you want to make sure that your picture is not distorted even if you stretch the shape it appears in, check the Lock Picture Aspect Ratio check box.
Click OK to apply the picture.
The picture appears in your document.


