Reorganizing a Master Document
The outlining skills you learned in Chapter 18, "Outlining: Practical Techniques for Organizing Any Document," are especially handy when you need to reorganize a master document. Display your document in Outline view and click Expand Subdocuments to view all the contents of your subdocuments. Now you can use Word's Outlining toolbar and keyboard shortcuts to rearrange any elements of your master document.
Moving an Entire Subdocument
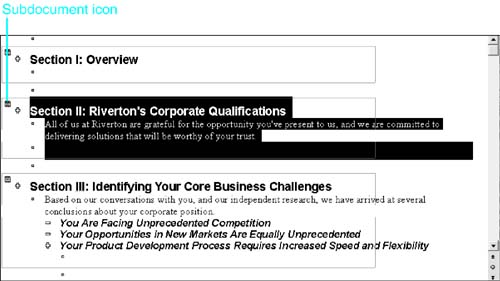
You might decide that you want to move an entire subdocument to a different location in your master document. First, use Word's Outlining and Master Documents toolbar buttons to display the portions of the master document you need to see to know exactly where you want to move the subdocument. Next, click the subdocument symbol to select the entire subdocument (see Figure 19.8).
Figure 19.8. You can select an entire subdocument by clicking its subdocument icon.
Now you can perform any of the following actions:
Move the subdocument intact to another location in your document. Drag the subdocument into the empty space between two other subdocuments. (By default, when you create subdocuments, Word leaves one paragraph of body text between them, just for this purpose.)
Move an entire subdocument into another subdocument, by using the Move Up or Move Down buttons. You get the same result as you would by merging subdocuments: The text in both subdocuments is now part of the same subdocument. (The subdocument you removed, however, remains on the hard disk?consider manually moving or deleting it to avoid confusion.)
NOTE
If you use Move Up/Move Down to move a subdocument into another subdocument and then move it back out, the text is placed in the master document. It is no longer a separate subdocument. You have to click Create Subdocument to make it a subdocument again?or click the Undo button until you revert to your starting point.
Use drag and drop to move an entire subdocument into another subdocument. This behaves differently than Move Up or Move Down. Now the subdocument where you've dropped the file contains its own subdocument. You're likely to use this feature only in exceptionally complex documents, where you may delegate a large section to someone who will in turn delegate smaller portions to others.
As you move subdocuments or the elements within them, a gray line appears, showing where your selected text will land if you release the mouse button.
TIP
If you move a subdocument to the wrong place, click Undo to move it back, and try again.
Moving Parts of Subdocuments
When it comes to moving or reorganizing individual headings and subordinate text, there's no difference between master documents and conventional documents. First, display your master document in Outline view and click the Master Document View button on the Outlining toolbar to access all your outlining and master document tools.
Next you can click on the plus sign next to the heading (in Outline view) to select all the text subordinate to it?or select just one paragraph. You can then use cut and paste, drag and drop, or the Move Up/Move Down buttons and keyboard shortcuts to move your selected text anywhere in the master document. It all works?whether your destination is the same subdocument, a different subdocument, or the master document itself.
Splitting a Subdocument into Two
Sometimes as you develop a large document, the contents of one subdocument may grow larger than you expected. Or, perhaps, your company might reorganize, and two people may have to divide responsibility for a chapter that was previously assigned to one individual. You might also discover that part of a chapter requires someone else's specialized knowledge.
In short, there are many reasons you might decide that one subdocument needs to be split into two. To split a subdocument, first display the subdocument's contents from within the master document. Next, click your insertion point where you want to split the subdocument. (You can split subdocuments before or after headings or paragraphs, but not in the middle of a paragraph.) Finally, click Split Subdocument.
You now have two subdocuments. The second subdocument contains all the text that originally followed the insertion point in your first subdocument.
Combining Multiple Subdocuments
Alternatively, you might find that two subdocuments are more closely related than you expected, and that a single individual should handle them both as part of the same document. In that case, you can combine two or more subdocuments into one.
NOTE
You can only combine adjacent subdocuments; if the subdocuments you want to combine are not adjacent, you can drag the subdocument symbol on one subdocument until it is immediately before or after the other subdocument.
To combine two or more subdocuments, follow these steps:
Open the document and display it in Master Document view.
Click Expand Subdocuments.
Make sure that the subdocuments are adjacent; use Word's outlining tools to move them if necessary.
Click the subdocument icon next to the first subdocument you want to combine.
Press Shift and click the subdocument icon next to the last subdocument you want to combine. You have now selected the first and last subdocuments, and any subdocuments in between.
Click Merge Subdocument. The first of the subdocuments you selected now contains all the text that previously appeared in all the individual subdocuments you selected.
NOTE
You can't combine subdocuments if they're marked with a padlock icon. Locking and unlocking subdocuments is discussed later in this chapter.
CAUTION
The other subdocuments you merged into the first subdocument no longer appear as separate subdocuments within your master document. However, they still exist as separate files on your hard disk. Either delete or move these "stranded" files so that nobody edits them, mistakenly believing they are working on the current version of the document.
Removing a Subdocument
Sometimes you want to keep the information contained in one or more subdocuments, but you no longer want to store that information in separate subdocuments. Possibly your colleagues have finished with their reviews, and you want to merge their subdocuments back into the master document, converting it back into a single document.
Follow these steps to eliminate the subdocument while moving its contents to the master document. First, expand the subdocuments, and click the subdocument icon to select the entire subdocument you want to convert. Next, click the Remove Subdocument button. The subdocument no longer appears in the master document, and all its text is copied into the master document, from where it can be edited. The outline of the overall master document is unchanged; all of its contents still appear in the same order as they did before.
CAUTION
The original subdocument file remains on disk after you remove a subdocument. If you no longer need it, you may want to move or delete it.
Adding an Existing Document to a Master Document
What if you have a document you want to add to an existing master document? (Or what if you want to add your document to a conventional document, thereby turning it into a master document?)
First, open the master document and click Expand Subdocuments. Next, click in the master document where you want to insert your subdocument and click Insert Subdocument. The Insert Subdocument dialog box opens (see Figure 19.9). Browse to select the document you want and click Open.
Figure 19.9. The Insert Subdocument dialog box enables you to make any document part of your master document.

NOTE
After you expand subdocuments, the toolbar button changes to the Collapse Subdocuments button. Click this button when you need to collapse the subdocuments again.
CAUTION
Before you insert an existing document into a master document, consider applying the same template that is used in the master document. This can reduce the need for Word to resolve style conflicts, one of the causes of corruption in master documents.
Word inserts the subdocument into your outline at your current insertion point. If any text is formatted with styles that have the same names as those in your master document, those styles are displayed to match the rest of your master document.


