Creating and Saving Documents for a SharePoint Team Site
Now that you have a functioning team site, you can create new documents for the team site and upload existing documents for the team site. We've already examined how to create a team site from a document, but if you already have a team site created, you'll need to know how to upload a new or existing document to an existing SharePoint team site.
Creating a document in Word and saving it to the SharePoint team site isn't completely straightforward. To control the upload of documents directly from Word, you must first configure the team site as a network place in My Network Places in Windows XP. To add your team site to My Network Places, use the following steps:
Double-click the My Network Places icon on the Windows XP desktop, or choose it from the Windows XP Start menu.
Choose Add a Network Place from the task pane.
Click Next from the Welcome screen. Windows will search for information on existing network providers.
Ensure that Choose Another Network Location is selected and click Next.
Enter the URL for your team site. It should be in the format of http://servername/teamsitename. Don't worry about the team site's home page name, default.aspx. Click Next.
Enter a name to associate with your team site. This name does not need to have anything to do with the name of your team site, although you probably want to keep a similar name for clarity. Click Next to continue.
Click Finish to complete the creation of your network place.
Now that you've added your team site to your My Network Places, you can save any Word document to the site. From within an existing document in Word, choose File, Save As to display the Save As dialog box. Choose the My Network Places icon from the shortcut bar. Double-click the network place you created to display the dialog shown in Figure 27.11.
Figure 27.11. Every SharePoint team site has a document library.
Double-click on the Document Library shown in the Save As window. Enter a name for your file and click Save. Depending on the speed of your network, it might take several seconds to upload your document to the team site. When you're done saving your document, you can visit the team site, shown in Figure 27.12.
Figure 27.12. After saving documents to your team site, you'll see them listed on the home page.
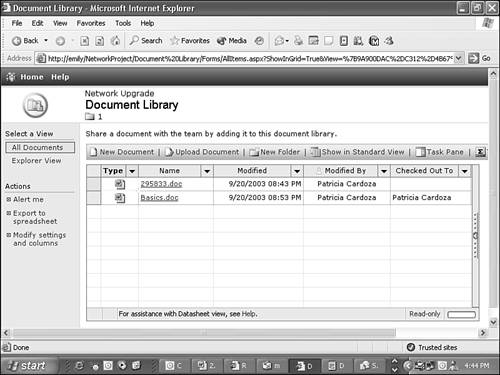
You'll see your document listed in the Document Library section of the team site. You can click the document to open it or click Document Library to display the screen shown in Figure 27.13.
Figure 27.13. From the Document Library page you can check out documents for editing.

To check out a document, hover your mouse over the name of the document and click the drop-down arrow that appears to the right of the filename. From this drop-down box, you can choose to edit the document in Microsoft Office Word, View Version History, or Check Out the document.
NOTE
Checking out a document marks the document on the team site. Other members who want to access the document will be informed that you've checked out the document.
Although they can still open the document, it will be read-only for all users except the one who has checked out the document. After you check the document back in, others can edit the document. We'll cover more on checking out a document later in this chapter.
In addition to saving currently open documents to your team site through Word, you can use Internet Explorer to upload documents directly from your team site. To upload a document to your team site though Internet Explorer, use the following steps:
Navigate to your team site's home page in Internet Explorer.
Click the link Add New Document under the Document Library section of the team site.
You can type the name and path for a file directly in the Name box, or you can click Browse to locate the file on your computer.
If you want to upload multiple files, click the Upload Multiple Files link to display what's shown in Figure 27.14.
Figure 27.14. You can upload multiple files from various locations.
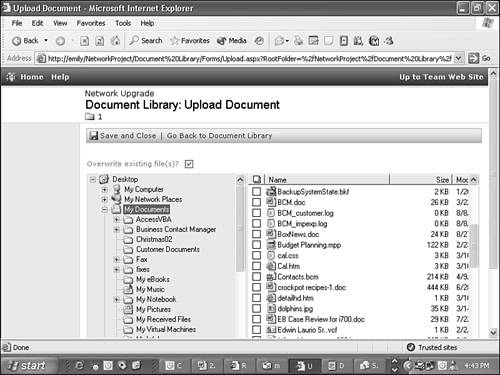
Use the treeview control on the left to navigate through your hard drive or network locations. Click the box next to the name of the file on the right pane to mark the file for upload.
When you're done selecting files, choose Save and Close from the top of the Web page. SharePoint will ask whether you're sure that you want to upload the files. Click Yes.
SharePoint will upload the files and return you to the team site's home page.
Managing Your Documents Using Datasheet View
Your document library can be viewed in standard view (as shown in the previous images) or in datasheet view. To switch to datasheet view, click the Datasheet view button. The datasheet view, shown in Figure 27.15, allows you to change the display of your Document Library and filter your view to show only specific documents.
Figure 27.15. Datasheet view allows you to easily filter the display of your documents.
For example, if you want to show all the documents modified on a specific date, click the drop-down arrow next to Modified. You can choose any of the values in the datasheet, or you can click Custom Filter to display Figure 27.16. You can choose to display documents modified on a specific date and time, or before or after a specific date. When you're done creating your filter, click OK to update your display. Use the same process to filter your documents based on any criteria displayed on the datasheet. To clear your filter, use the drop-down, and click Show All.
Figure 27.16. You can create a custom filter for your datasheet.
Using the Task Pane Within Your Team Site
While you're in datasheet view, you can display the task pane to help you work with your documents. Click Task Pane to display the task pane on the right of the datasheet view, as shown in Figure 27.17.
Figure 27.17. From the task pane, you can manipulate your existing documents.
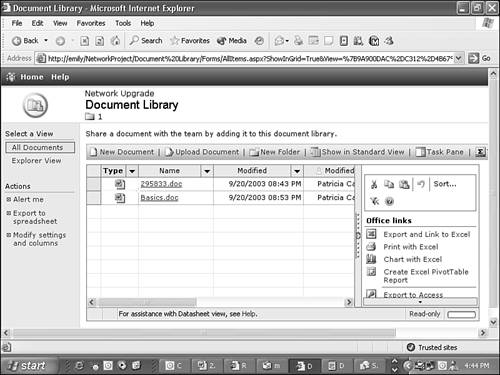
You can perform various tasks from the task pane, including printing, creating a chart, exporting information to Excel, or creating a Microsoft Access report. You can also sort the information displayed in the datasheet.


