Protecting an Entire Form with Editing Restrictions
When you have finished preparing your form, you need to protect it?preventing users from making unauthorized changes to the underlying form, while allowing them to fill out the form fields you have provided for them.
NOTE
A form doesn't behave like a form until you protect it.
When you protect a form, some form fields that provide specific information can't be changed either. For example, in a protected form field, a user can't override the calculation you've built into a text form field.
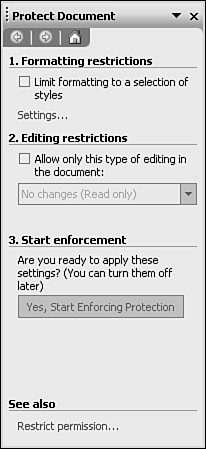
To protect a form, first open it. Then choose Tools, Protect Document. The task pane shown in Figure 28.13 appears.
Figure 28.13. Protecting a form.

Check the Allow Only This Type of Editing in the Document check box. Then, choose Filling in Forms from the drop-down box. Click Yes, Start Enforcing Protection.
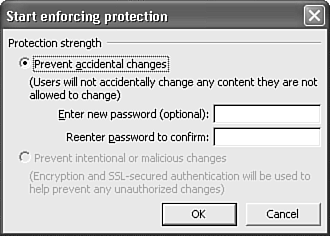
Word now displays the Start Enforcing Protection dialog box (see Figure 28.14). Here, you can protect your form with a password, if you choose. Include a password if there's any risk that your form might otherwise be edited inappropriately. (You don't want sabbaticals in Tahiti added to your benefits option form.)
Figure 28.14. Setting a forms password.

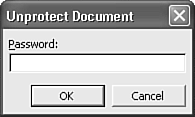
Form passwords by themselves don't encrypt the document. Users can still open a password-protected form template; they just can't unprotect and edit it. To unprotect such a document, click Stop Protection on the Protect Document task pane. The Unprotect Document password dialog box opens, as shown in Figure 28.15.
Figure 28.15. The Unprotect Document password dialog box.

As always when creating password names, choose a password you'll remember but nobody else can figure out. Don't write it down and leave it in an obvious location. And remember, after you create and confirm a password, you have no way to unprotect the document without the password.
To remove a password, first open the document (using its password). Then unprotect it using the Unprotect Document option on the Tools menu. Then protect it again by choosing Protect Document from the Tools menu. Choose Forms in the Protect Document dialog box. No password appears in the Password box. If you don't want the file to be protected by a password, click OK. When you save the file, it no longer requires a password. (If you want a new password, type it and confirm it. After you save the file, the new password goes into effect.)
TIP
In some cases, you may not need "heavy-duty" protection against malicious changes: You may simply want to keep forms from being changed inadvertently while you're working with them. To quickly protect a form against inadvertent change, open the form. Display the Forms toolbar (View, Toolbars, Forms); then click the Protect Form button.
Protecting a Section of a Form
Word enables you to divide your document or template into multiple sections and protect only one section. This enables users to edit at will elsewhere in their form documents?but when they come to the section you've set up as a form, they're restricted to making changes in only the contents of form fields.
To protect only a section of your form document or template, start by separating your document into sections by choosing Insert, Break and choosing one of Word's section break types. (If you don't want extra page?or column?breaks in your form, choose Continuous.)
Then, to protect a specific section, follow these steps:
Choose Tools, Protect Document to display the Protect Document task pane.
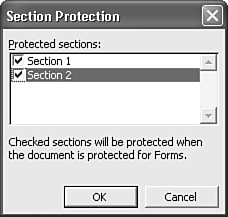
Click the Select Sections hyperlink. The Section Protection dialog box opens (see Figure 28.16).
Figure 28.16. You can specify which sections of your form you want to protect.

Clear any sections you do not want to protect; check the sections you do want to protect.
Click OK when you're finished, and click OK again to close the Protect Document dialog box.


