Inserting an image
Inserting an image
When you insert an image into a Dreamweaver document, Dreamweaver automatically generates a reference to the image file in the HTML source code. To ensure that this reference is correct, the image file must be in the current site. If it is not in the current site, Dreamweaver asks whether you want to copy the file into the site.
You can also insert images dynamically. Dynamic images are those images that change often. For example, advertising banner rotation systems need to randomly select a single banner from a list of potential banners, and then dynamically display the selected banner’s image when a page is requested. For more information, see Making images dynamic.
To insert an image:
- Place the insertion point where you want the image to appear in the Document window, then do one of the following:
- In the Common category of the Insert bar, click the Image icon.

- In the Common category of the Insert bar, drag the Image icon to the Document window (or to the Code view window if you are working in the code).
- Select Insert > Image.
- Drag an image from the Assets panel (Window > Assets) to the desired location in the Document window; then skip to step 3.
- Drag an image from the Site panel to the desired location in the Document window; then skip to step 3.
- Drag an image from the desktop to the desired location in the Document window; then skip to step 3.
- In the Common category of the Insert bar, click the Image icon.
- In the dialog box that appears, do one of the following:
- Select File System to choose a graphic file.
- Select Data Source to choose a dynamic image source.
- Browse to select the image or content source you want to insert.
If you are working in an unsaved document, Dreamweaver generates a file:// reference to the image file. When you save the document anywhere in the site, Dreamweaver converts the reference to a document-relative path.
- Click OK.
The Image Tag Accessibility Attributes dialog box appears if you have activated the dialog box in Preferences (see Optimizing the workspace for accessible page design).
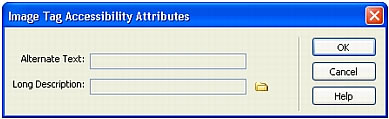
- Enter values in the Alternative Text and Long Description text boxes, then click OK.
NOTE
You can enter information in one or both text boxes depending on your needs.
For more information see Setting the Image Tag Accessibility Attributes dialog box options.
The image appears in your document.
NOTE
If you click Cancel, the image appears in the document, but Dreamweaver does not associate accessibility tags or attributes with it.
- In the Property inspector (Window > Properties), set properties for the image.
For more information, see Setting image properties.
To edit accessibility attributes for the image, see Editing accessibility attributes for an image.
Related topics
- Setting a background image or background page color
- Using spacer images
Editing accessibility attributes for an image
If you inserted accessibility attributes for an image (see Inserting an image), you can edit those values in the HTML code.
To edit accessibility values for an image:
- In the Document window, select the image.
- Do one of the following:
- Edit the appropriate image attributes in Code view.
- Right-click (Windows) or Control-click (Macintosh), and then select Edit Tag Code.
- Edit the Alt value in the Property inspector.
 |  |


