Creating a dialog box for a custom server behavior
Creating a dialog box for a custom server behavior
Server behaviors often require that the page designer supply a parameter value. This value must be inserted before the server behavior’s code is inserted into the page. To do this, you can create a dialog box that prompts the person implementing the server behavior for a parameter value.
You create the dialog box by defining the designer-supplied parameters in the code. After defining all the parameters, you can generate a dialog box for the server behavior.
NOTE |
|
A parameter is added to your code block without your intervention if you specify that your code should be inserted relative to a specific tag chosen by the page designer (that is, you chose Relative to a Specific Tag in the Insert Code pop-up menu). The parameter adds a tag menu to the behavior’s dialog box to let the page designer select a tag. |
To create a parameter in the server behavior’s code:
- Enter a parameter marker at the point in the code where you want to insert the supplied parameter value. The syntax for the parameter is as follows:
@@
parameterName@@
For example, if the server behavior contains the following code block:
<% Session("lang_pref") = Request.Form("Form_Object_Name"); %>
To let the page designer supply the value of Form_Object_Name, enclose the string in parameter markers (@@):
<% Session("lang_pref") = Request.Form("@@Form_Object_Name@@"); %>
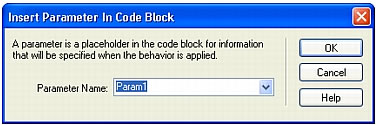
You can also highlight the string and click the Insert Parameter In Code Block button. Enter a parameter name and click OK. Dreamweaver replaces every instance of the highlighted string with the specified parameter name enclosed in parameter markers.
Dreamweaver uses the strings you enclose in parameter markers to label the controls in the dialog box it generates (see the following procedure). In the previous example, Dreamweaver creates a dialog box with the following label:
NOTE |
|
Parameter names in the server behavior code cannot have any spaces. Therefore, the dialog box labels cannot have any spaces. If you want to include spaces in the label, you can edit the generated HTML file. |
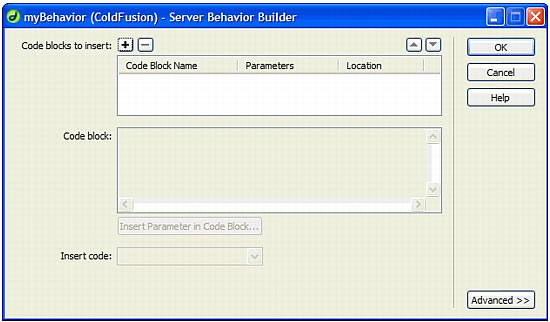
To create a dialog box for a server behavior:
- In the Server Behavior Builder, click Next.
A dialog box appears listing all of the designer-supplied parameters you defined in your code.
- (Optional) You can change the display order of the dialog box controls by selecting a parameter and clicking the up and down arrows.
- (Optional) If you want, change a parameter’s control by selecting the parameter and choosing another control in the Display As column.
- Click OK.
Dreamweaver generates a dialog box with a labeled control for each designer-supplied parameter you defined.
To view the dialog box:
- Click the Plus (+) button in the Server Behaviors panel (Window > Server Behaviors), and select your server behavior from the pop-up menu.
To edit the dialog box of a server behavior you created:
- In the Server Behaviors panel (Window > Server Behaviors), click the Plus (+) button and select Edit Server Behaviors from the pop-up menu.
- Select your server behavior from the list, and click Open.
The Server Behavior Builder appears with your server behavior.
- Click Next.
A dialog box appears listing all the designer-supplied parameters you defined in your code.
- (Optional) You can change the display order of the dialog box controls by selecting a parameter and clicking the up and down arrows.
- (Optional) If you want, change a parameter’s control by selecting the parameter and choosing another control in the Display As column.
- Click OK.
 |  |


