Adding logic to delete the record (PHP)
Adding logic to delete the record (PHP)
After creating a confirmation page (see Displaying the record on the confirmation page (PHP)), the next step in building a record delete page is to add logic to the confirmation page that deletes the record from the database when the user clicks the Confirm button. You can add this logic quickly and easily in Dreamweaver with the Delete Record server behavior.
To add logic to delete the record displayed in the HTML form:
- In the Server Behaviors panel (Window > Server Behaviors), click the Plus (+) button and select Delete Record.
The Delete Record dialog box appears.
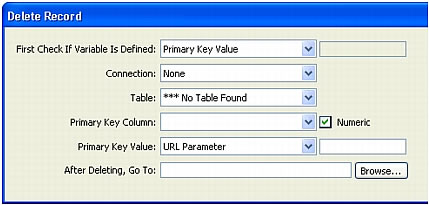
- In the First Check If Variable Is Defined text box, make sure Primary Key Value is selected.
You specify the primary key value later in the dialog box.
- In the Connection pop-up menu, select a connection to the database so that the server behavior can connect to the affected database.
- In the Table pop-up menu, select the database table that contains the records that will be deleted.
- In the Primary Key Column pop-up menu, select the table column that contains record IDs.
The Delete Record server behavior will search this column for a match. The column should contain the same record ID data as the recordset column you bound to the hidden form field on the page.
If the record ID is numeric, select the Numeric option.
- In the Primary Key Value pop-up menu, select the variable on your page that contains the record ID identifying the record to be deleted.
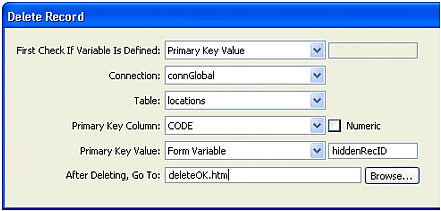
The variable is created by your hidden form field. It has the same name as the name attribute of the hidden field and is either a form or URL parameter, depending on the form’s method attribute. In our example, the variable is a form variable called hiddenRecID.
- In the After Deleting, Go To text box, specify a page to open after the record has been deleted from the database table.
You can specify a page that contains a brief success message to the user, or a page listing the remaining records so that the user can verify that the record has been deleted.
The completed Delete Record dialog box should look as follows:
- Click OK and save your work.
Upload the pages to your web server (if required), open a browser and search for a record to delete. When you click a Delete link on the results page, the confirmation page appears. Click the Confirm button to delete the record from the database. To verify that the record has been deleted, open the page with the Delete links again. The record no longer appears in the list.
NOTE
Click Refresh if the record still appears on the page.
 |  |


