Moving a layer using a timeline animation
Moving a layer using a timeline animation
The most common kind of timeline animation involves moving a layer along a path. Timelines can move only layers. To make images or text move, create a layer using the Draw Layer button on the Insert bar and then insert images, text, or any other type of content in the layer (see Inserting a layer).
Timelines can also change other attributes of layers and images; for more information, see Changing image and layer properties with timelines.
To animate a layer using a timeline:
- Move the layer to where it should be when the animation begins.
- Select Window > Timelines.
- Select the layer you want to animate.
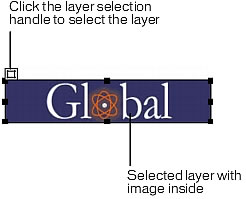
Make sure you have selected the desired element. Click the layer marker or the layer selection handle, or use the Layers panel to select a layer. For more information, see Manipulating layers. When a layer is selected, handles appear around it as shown in the following illustration.

Clicking inside the layer places a blinking insertion point inside the layer, but it does not select the layer.
- Select Modify > Timeline > Add Object to Timeline or simply drag the selected layer into the Timelines panel.
A bar appears in the first channel of the timeline. The name of the layer appears in the bar.
- Click the keyframe marker at the end of the bar.
- Move the layer on the page to where it should be at the end of the animation.
A line appears showing the path of the animation in the Document window.
- If you want the layer to move in a curve, select its animation bar and Control-click (Windows) or Command-click (Macintosh) a frame in the middle of the bar to add a keyframe at the frame you clicked, or click a frame in the middle of the animation bar and select Add Keyframe from the context menu.
Repeat this step to define additional keyframes.
- Hold down the Play button to preview the animation on the page.
Repeat the procedure to add additional layers and images to the timeline and to create a more complex animation.
 |  |


