Insert Flash Video
Insert Flash Video
Next you’ll insert a Flash Video file, using the asset provided.
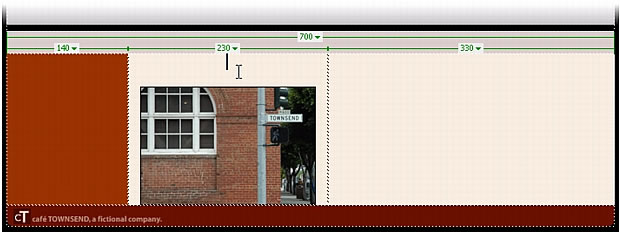
- With the index.html page open in the Dreamweaver Document window, click once above the graphic that you placed in the center column of the three-columned table.
In the previous section, you created some space before you inserted the graphic--this is where you should click.
- Select Insert > Media > Flash Video.
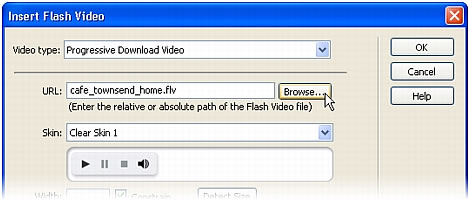
- In the Insert Flash Video dialog box, select Progressive Download Video from the Video type pop-up menu.
ABOUT...
About Flash Video The Insert Flash Video command in Dreamweaver lets you insert Flash Video content in your web pages without using the Flash authoring tool. The command inserts a Flash component, which displays the Flash Video content you select, as well as a set of playback controls, when viewed in a browser.
The Insert Flash Video command gives you the following options for delivering video content to your site visitors:
Progressive Download Video downloads the Flash Video (FLV) file to the site visitor’s hard disk and then plays it. Unlike traditional "download and play" methods of video delivery, however, progressive download allows the video file to start playing before the download is complete.
Streaming Video streams the Flash Video content and plays it on a web page immediately. To enable streaming video on your web pages, however, you must have access to Macromedia Flash Communication Server, the only server that can stream Flash Video content.
For more information about using Flash Video, see Inserting Flash Video content in Using Dreamweaver.
- In the URL text box, specify a relative path to the cafe_townsend_home.flv file by clicking Browse, navigating to the cafe_townsend_home.flv file (located in cafe_townsend root folder of your site), and selecting the FLV file.
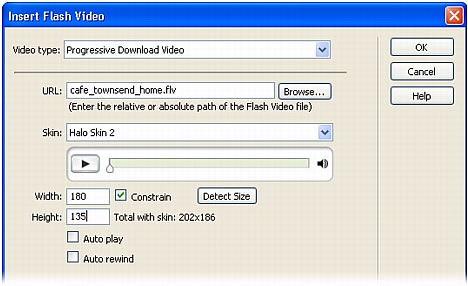
- Select Halo Skin 2 from the Skin pop-up menu.
A preview of the selected skin appears below the Skin pop-up menu. The Skin option specifies the look and feel for the Flash Video component that will contain the Flash Video content.
For more information on how to select different skins for Flash Video components, see www.macromedia.com/go/flv_tutorial.
- In the Width and Height text boxes, do the following:
- In the Width text box, type 180.
- In the Height text box, type 135 and press Enter (Windows) or Return (Macintosh).
TIP
You can click Detect Size to determine the exact width and height of the FLV file. Sometimes, however, Dreamweaver cannot determine the dimensions of the FLV file. In such cases, you must manually enter the width and height values.
The value in the Width and Height text boxes specifies the width and height in pixels of the FLV file. You can adjust these values arbitrarily to change the size of the Flash Video on your web page. When you increase the dimensions of a video, the picture quality of the video usually decreases.
NOTE
"Total with skin" is the width and height of the FLV file plus the width and height of the selected skin.
- Leave the default selections for the remaining options:
Constrain maintains the same aspect ratio between the width and height of the Flash Video component. This option is selected by default.
Auto play specifies whether to play the video when the web page is opened. This option is deselected by default.
Auto rewind specifies whether the playback control returns to starting position after the video finishes playing. This option is deselected by default.
- Click OK to close the dialog box and add the Flash Video content to your web page.
The Insert Flash Video command generates a video player SWF file and a skin SWF file that are used to display your Flash Video content on a web page. (You may need to click the Refresh button in the Files panel to see the new files.) These files are stored in the same directory as the HTML file to which you’re adding Flash Video content (in this case, the cafe_townsend root folder). When you upload the HTML page containing the Flash Video content, Dreamweaver uploads these files as dependent files (as long as you click Yes in the Put Dependent Files dialog box).
- Save the page.
 |  |


