Linking to a specific place in a document
Linking to a specific place in a document
You can use the Property inspector to link to a particular section of a document by first creating named anchors. Named anchors let you set markers in a document, which are often placed at a specific topic or at the top of a document. You can then create links to these named anchors, which quickly take your visitor to the specified position.
Creating a link to a named anchor is a two-step process. First, you create a named anchor; then you create a link to the named anchor.
To create a named anchor:
- In the Document window’s Design view, place the insertion point where you want the named anchor.
- Do one of the following:
- Select Insert > Named Anchor.
- Press Control+Alt+A (Windows) or Command+Option+A (Macintosh).
- In the Common category of the Insert bar, click the Named Anchor button.
The Named Anchor dialog box appears.
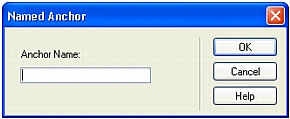
- In the Anchor Name text box, type a name for the anchor, and click OK.
For more information, see Setting the Named Anchor option.
The anchor marker appears at the insertion point.
NOTE
If you do not see the anchor marker, select View > Visual Aids > Invisible Elements.
To link to a named anchor:
- In the Document window’s Design view, select text or an image to create a link from.
- In the Link text box of the Property inspector, type a number sign (#) and the name of the anchor. For example:
- To link to an anchor named "top" in the current document, type #top.
- To link to an anchor named "top" in a different document in the same folder, type filename.html#top.
NOTE
Anchor names are case-sensitive.
To link to a named anchor using the point-to-file method:
- Open the document containing the named anchor you want.
NOTE
If you don’t see the anchor, select View > Visual Aids > Invisible Elements to make it visible.
- In the Document window’s Design view, select text or an image you want to link from. (If this is another open document, you must switch to it.)
- Do one of the following:
- Click the Point-to-File icon to the right of the Link text box in the Property inspector and drag it to the anchor you want to link to: either an anchor within the same document or an anchor in another open document.
- Shift-drag in the Document window from the selected text or image to the anchor you want to link to: either an anchor within the same document or an anchor in another open document.
Related topics
- Linking files and documents
- Creating an e-mail link
- Creating null and script links
Creating an e-mail link
An e-mail link opens a new blank message window (using the mail program associated with the user’s browser) when clicked. In the e-mail message window, the To text box is automatically updated with the address specified in the e-mail link.
To create an e-mail link using the Insert E-mail Link command:
- In the Document window’s Design view, position the insertion point where you want the e-mail link to appear, or select the text or image you want to appear as the e-mail link.
- Do one of the following to insert the link:
- Select Insert > E-mail Link.
- In the Common category of the Insert bar, click the Insert E-mail Link button.
The E-mail Link dialog box appears.
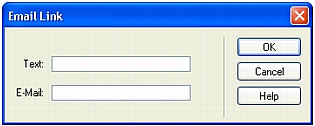
- Complete the dialog box.
For more information, see Setting E-mail Link options.
- Click OK.
To create an e-mail link using the Property inspector:
- Select text or an image in the Document window’s Design view.
- In the Link text box of the Property inspector, type mailto: followed by an e-mail address.
Do not type any spaces between the colon and the e-mail address. For example, type mailto:jlydon@macromedia.com.
Related topics
- Linking to a specific place in a document
- Linking to a specific place in a document
- Creating null and script links
Creating null and script links
The most familiar kinds of links are those to documents and named anchors (see Linking files and documents and Linking to a specific place in a document), but there are other types of links as well.
A null link is an undesignated link. Use null links to attach behaviors to objects or text on a page. Once you have created a null link, you can attach a behavior to it to swap an image or to display a layer when the pointer is moved over the link. For information about attaching behaviors to objects, see Applying a behavior.
Script links execute JavaScript code or call a JavaScript function and are useful for giving visitors additional information about an item without leaving the current web page. Script links can also be used to perform calculations, form validations, and other processing tasks when a visitor clicks a specific item.
To create a null link:
- Select text, an image, or an object in the Document window’s Design view.
- In the Property inspector, type javascript:; (the word javascript, followed by a colon, followed by a semicolon) in the Link text box.
To create a script link:
- Select text, an image, or an object in the Document window’s Design view.
- In the Link text box of the Property inspector, type javascript: followed by some JavaScript code or a function call.
For example, typing javascript:alert('This link leads to the index') in the Link text box produces a link that, when clicked, displays a JavaScript alert box with the message "This link leads to the index".
NOTE
Because the JavaScript code appears in the HTML between double quotation marks (as the value of the
hrefattribute), you must use single quotation marks in the script code or "escape" any double quotation marks by preceding them with a backslash (for example,\"This link leads to the index\").
Related topics
- Linking to a specific place in a document
- Creating an e-mail link
 |  |


