Insert an image from the Assets panel
Insert an image from the Assets panel
- Click once inside the center column of the three-columned table (the first table cell that is colored light tan).
- In the Property inspector (Window > Properties), select Center from the Horz pop-up menu, and select Top from the Vert pop-up menu. This aligns the contents of the table cell in the middle of the cell, and pushes the cell’s contents to the top of the cell.

NOTE
If you cannot see the Vert or Horz pop-up menus, click the expander arrow in the lower-right corner of the Property inspector.
- Press Enter (Windows) or Return (Macintosh) once to create more space.
- Click the Assets tab in the Files panel, or select Window > Assets.
Your site assets appear.
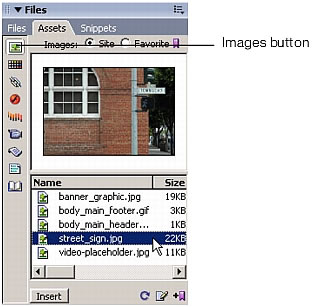
- If Images view isn’t selected, click Images to view your image assets.
- In the Assets panel, select the street_sign.jpg file.
ABOUT...
The Assets panel You can use the Assets panel to view and manage assets in your current site. The Assets panel displays assets for the site associated with the active document in the Document window.
You must define a local site before you can view assets in the Assets panel. For more information, see Tutorial: Setting Up Your Site and Project Files or Using Dreamweaver.
The Assets panel provides two views:
The Site list shows all of the assets in your site, including colors and URLs that are used in any document in your site.
The Favorites list shows only the assets you’ve explicitly chosen. To add an asset to the Favorites list, select the asset in the Site list, and then select Add to Favorites from the Options menu in the upper-right corner of the Files panel.
When you click an asset in the Assets panel, the preview area displays the asset you selected. To change the size of the preview area, drag the line that separates the preview area from the asset column headings.
For more information, see Working with assets in Using Dreamweaver.
- Do one of the following:
- Drag the street_sign.jpg file to the insertion point in the center table cell.
- Click Insert at the bottom of the Assets panel.
NOTE
If the Image Tag Accessibility Attributes dialog box appears, click OK.
The street_sign.jpg graphic appears on the page.
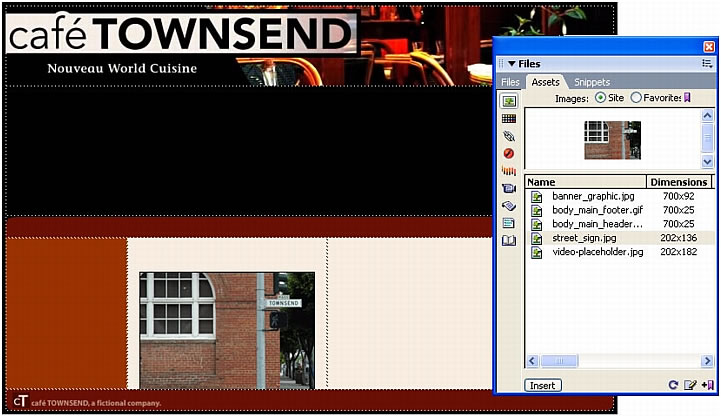
- Click once outside the table to deselect the image.
- Save the page.
 |  |


