Optimizing the workspace for accessible page design
Optimizing the workspace for accessible page design
When you create accessible pages, you need to associate information, such as labels and descriptions, with your page objects to make your content accessible to all users.
To do this, activate the Accessibility dialog box for each object, so that Dreamweaver prompts you for accessibility information when you insert objects. You can activate a dialog box for any of the objects in the Accessibility category in Preferences.
To activate the Accessibility dialog boxes:
- Select Edit > Preferences (Windows) or Dreamweaver > Preferences (Macintosh).
The Preferences dialog box appears.
- Select Accessibility from the Category list on the left.
The Preferences dialog box displays accessibility options.
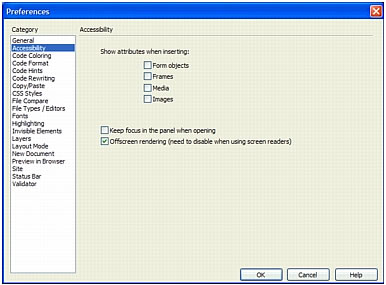
- Select the objects you want to activate Accessibility dialog boxes for.
For more information, see Setting Accessibility preferences.
NOTE
Accessibility attributes automatically appear in the Insert Table dialog box when you insert a new table.
- Click OK.
For each object you select, an Accessibility dialog box prompts you to enter accessibility tags and attributes when you insert that object in a document.
Related topics
- Dreamweaver and accessibility
- Inserting an image
- Validating HTML form data
- Creating frames and framesets
- Inserting and editing media objects
- Inserting a table and adding content
 |  |


