Working with pages in the site map
Working with pages in the site map
When working in the site map, you can select pages, open a page for editing, add new pages to the site, create links between files, and change page titles.
To select multiple pages in the site map, do one of the following:
- Shift-click to select a range of adjacent pages.
- Starting from a blank part of the view, drag around a group of files to select them.
- Control-click (Windows) or Command-click (Macintosh) to select nonadjacent pages.
To open a page in the site map for editing, do one of the following:
- Double-click the file.
- Right-click (Windows) or Control-click (Macintosh) the file, then select Open.
To add an existing file to the site, do one of the following:
- Drag the file from the Windows Explorer or the Macintosh Finder to a file in the site map. The page is added to the site, and a link is created between it and the file you dragged it to.
- Right-click (Windows) or Control-click (Macintosh) the file in the site map, select Link to Existing File, then browse to the file.
To create a new file and add a link in the site map:
- Select a file in the site map.
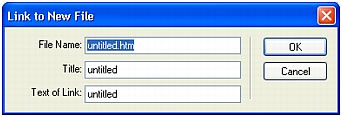
- Right-click (Windows) or Control-click (Macintosh), then select Link to New File.
The Link to New File dialog box appears.

- Enter a name, title, and text for the link.
- Click OK.
Dreamweaver saves the file in the same folder as the selected file. If you add a new file to a hidden branch, the new file is also hidden (see Showing and hiding site map files).
To modify the title of a page in the site map:
- Make sure page titles are showing by clicking the Options menu in the upper-right corner of the collapsed Files panel, then selecting File > Rename View > Show Page Titles.

- Select a file in the site map, then do one of the following:
- Click the title. When the title becomes editable, enter a new title.
- Click the Options menu in the upper-right corner, then select File > Rename.
- Press Enter (Windows) or Return (Macintosh) after you type the new name.
NOTE
When you work in the Files panel, Dreamweaver automatically updates all links to files whose names have changed.
To change the home page in the site map, do one of the following:
- In the Local view of the Files panel, select a file; right-click (Windows) or Control-click (Macintosh), then select Set as Home Page.
- In the Files panel, select Manage Sites from the pop-up menu where the current site, server, or drive appears, then click Edit. Select Site Map Layout in the Site Definition dialog box category list. Browse to a new home page, then click OK.
To update the site map display after making changes:
- Click anywhere in the site map to deselect any files.
- Click the Refresh button in the Files panel toolbar.
Related topics
- Viewing a site map
- Modifying the site map layout
- Saving the site map
 |  |
Remember the name: eTutorials.org
Copyright eTutorials.org 2008-2023. All rights reserved.


